Exporting contacts is done via the Databases page under the primary Contacts Management section. To export contacts via a CSV file from a database, click the horizontal three dot icon to the left of the database name, which will open your "ACTIONS" column dropdown list.
NOTE: It is highly recommended you read the "New UI Basic Functions Overview" article first, as it provides an overview of all Pinpointe audience types and how the various pages and sections are accessed and structured.
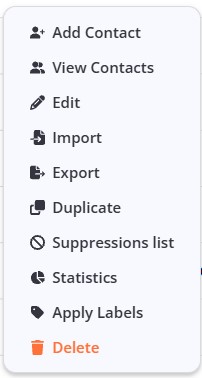
Select the "Export" menu option. This will bring up the first pane of a series of three in a modal.
- The first pane is Options.
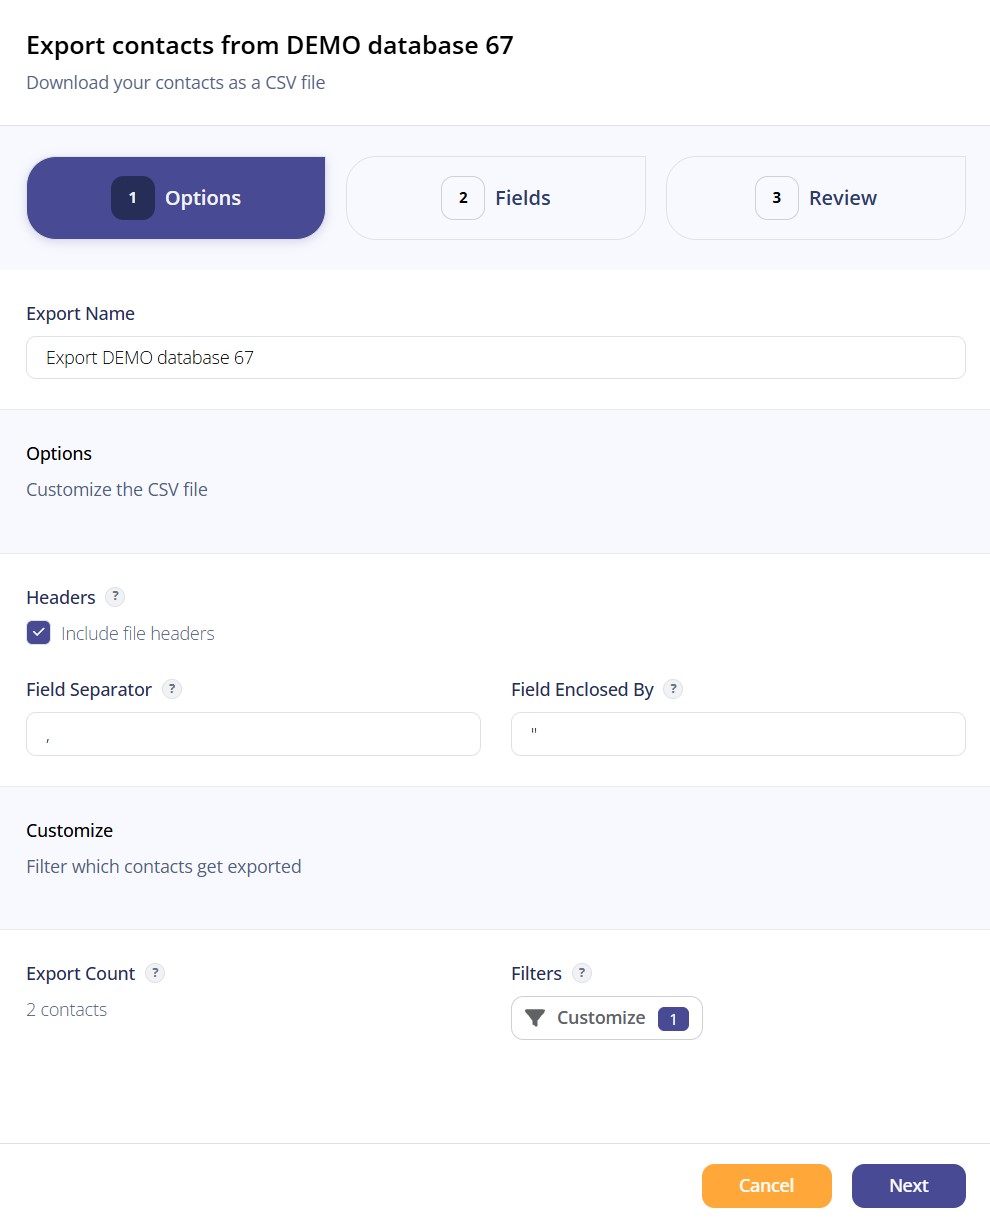
The Option pane has several input fields and control options.
- Export Name - input the name of your export file
- Headers
- Field Separator - this will default to a comma (,), which is the standard separator, but you can use any UTF-8 supported character
- Field Enclosed By - this will default to a double quotation mark (") and will enclose each field value.
- Field Separator - this will default to a comma (,), which is the standard separator, but you can use any UTF-8 supported character
- Customize
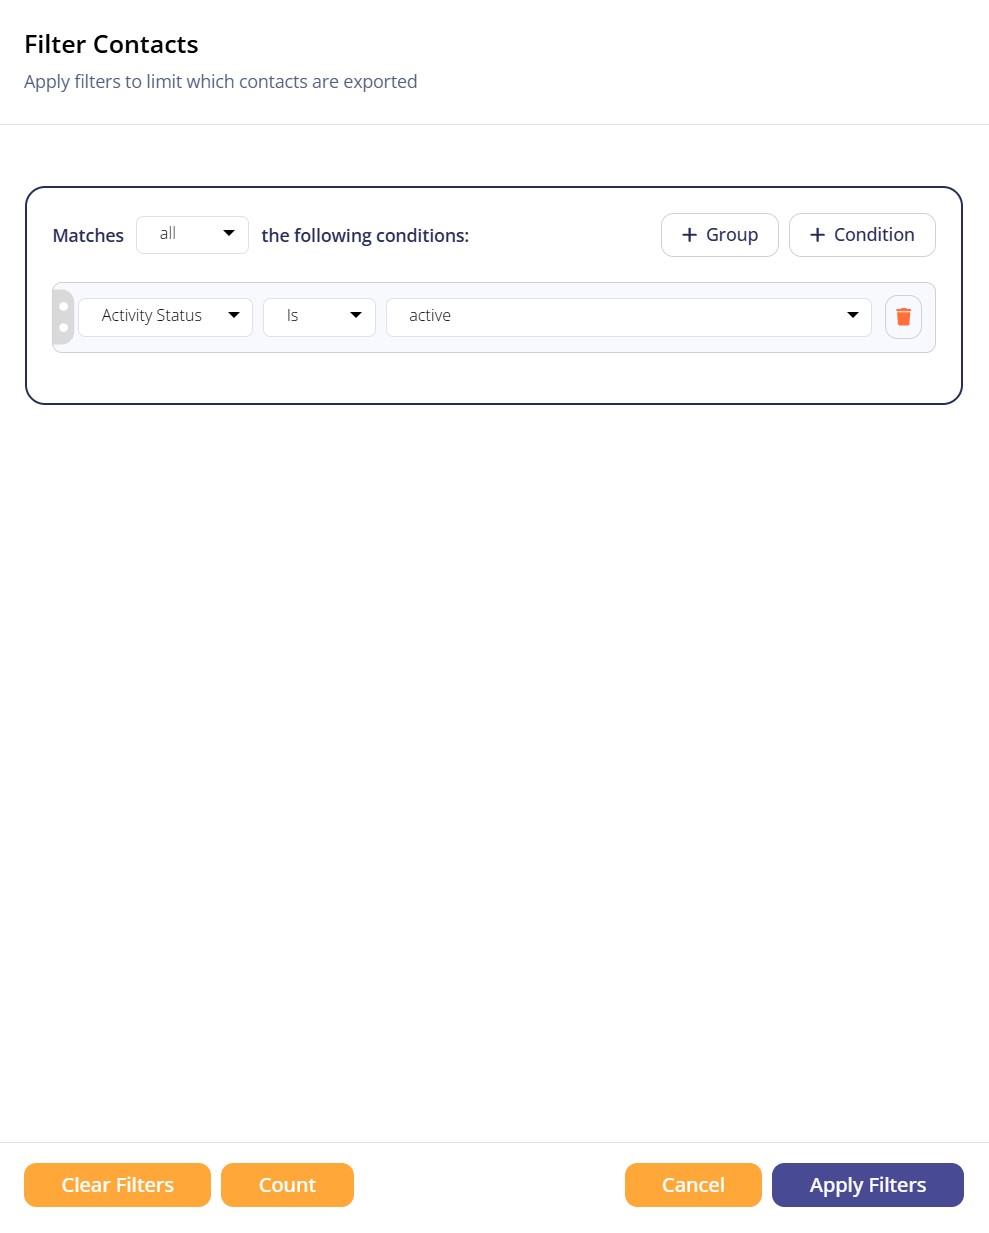
- Filters - You may apply filters to the database contacts to refine the population you are exporting. Clicking on the "Filters" button displays a new pane entitled Filter Contacts. This pane allows you to create filters ("conditions") and apply them to the database audience. For a more in-depth discussion of filters, please review our Segments Knowledge Base article.
- Export Count - displays the total number of contacts that will be exported.
Once you are finished on this pane, click the "Next" button.
- The second pane is Fields
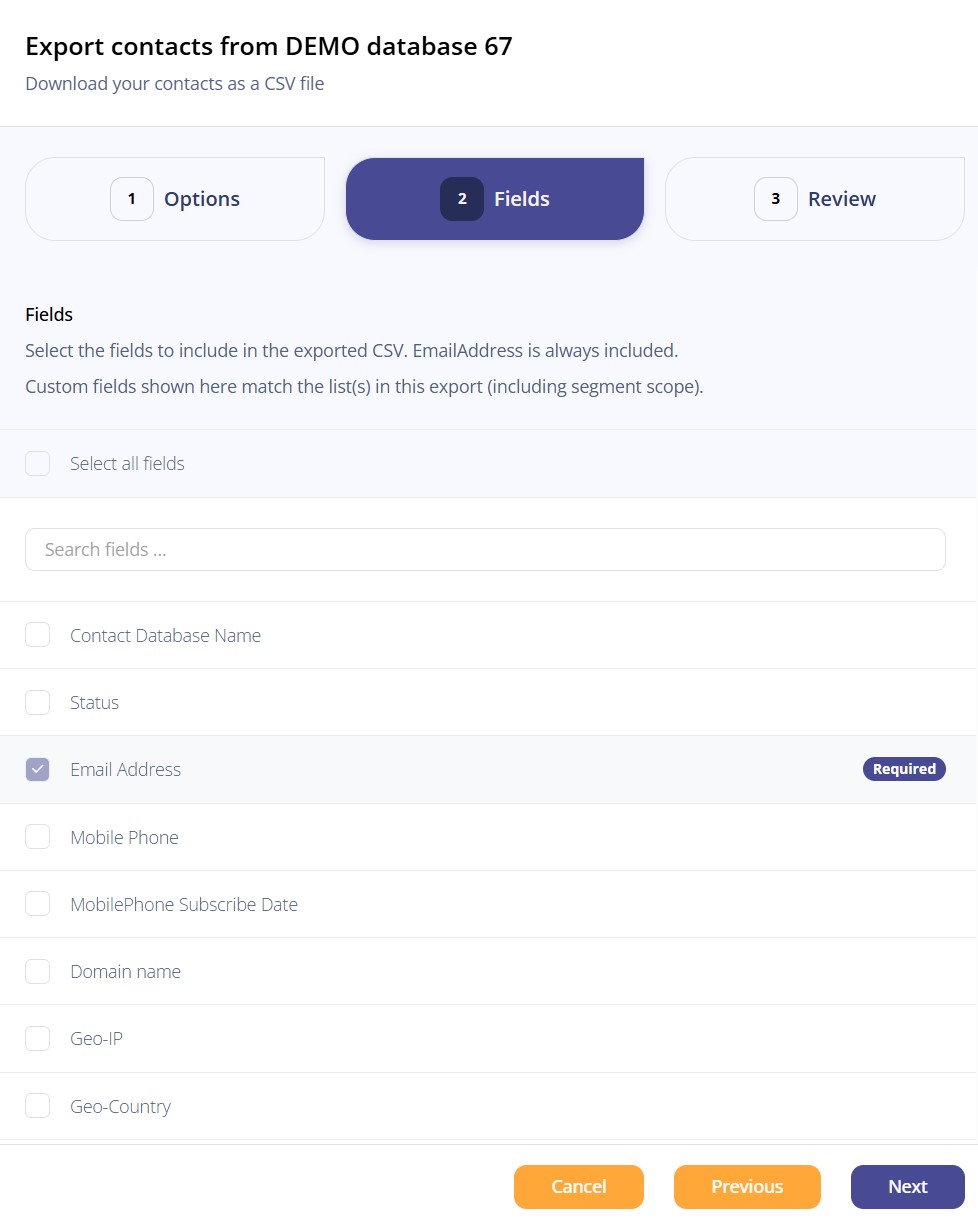
The Fields pane allows you to select which custom fields attached to the target database and their respective values will be included in the export. By default, "Email Address" will always be selected.
Once you have selected your fields, click the "Next" button.
- The third and final pane is Review
As its names suggests, this pane allows you to review your export setup prior to doing the actual file export. Once you have completed your review, click the "Export" button. A CSV file will be generated.
After the CSV file has completed generating, you will be automatically redirected to the Export Queue page in the Import / Export section. Find your target export form the list of exports displayed, and click the small down arrow icon under the "ACTION" column to the far right. This will result in a CSV file being downloaded to your local system.