Pinpointe's New UI features updated, easier to use menus and a new look across several parts of the platform including Contacts, the Import / Export Queue, and Email Campaigns.
Let's take a broad look at the pages that feature the New UI:
TABLE OF CONTENTS
Contacts Management
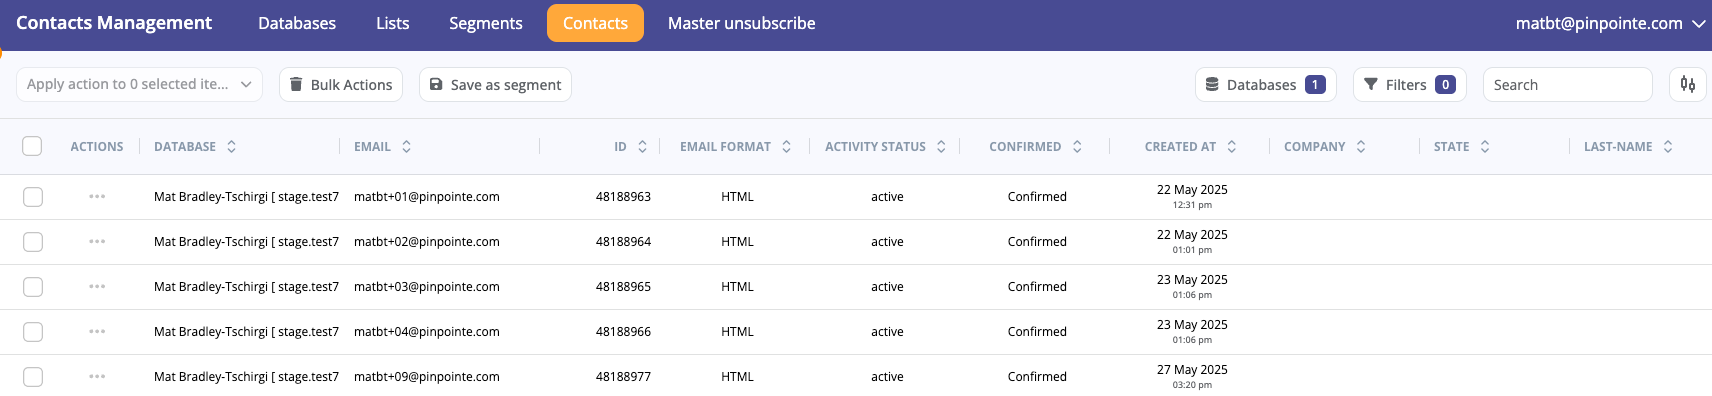
Clicking on the "Contacts" option on the main left-hand menu will reveal a dropdown with several options, including "Manage Database(s)", "Manage Lists", and "Manage Segments". Selecting any of these three options will take you to the Contacts Management page.
Please note the new structure consistent across all impacted pages.
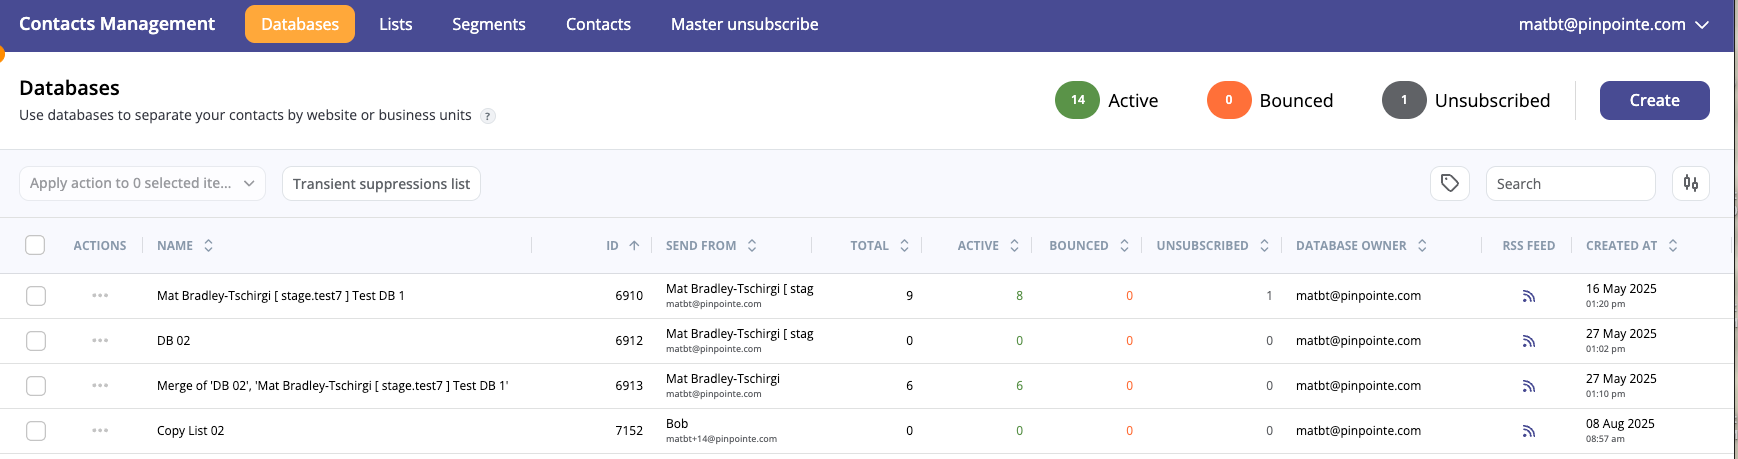
- Each section, such as Databases, will show an "ACTIONS" column at the far left. To access the available menu options per audience type under this column, click the three horizontal dots next to the name of the database, list or segment.
- The database, list or segment ID is now readily available under its own column.
- By clicking on the small "tag" icon just below the Unsubscribed counter near the top right of the page, you may toggle the "Labels" panel open. You may then select a label, and the databases, lists or segments that have been assigned that label will populate the main panel.
- At the top right of the page, just to the right of the "Search" input field, you will see an icon that looks like two vertical sliders. Clicking that lets you choose which columns will be visible on the page.
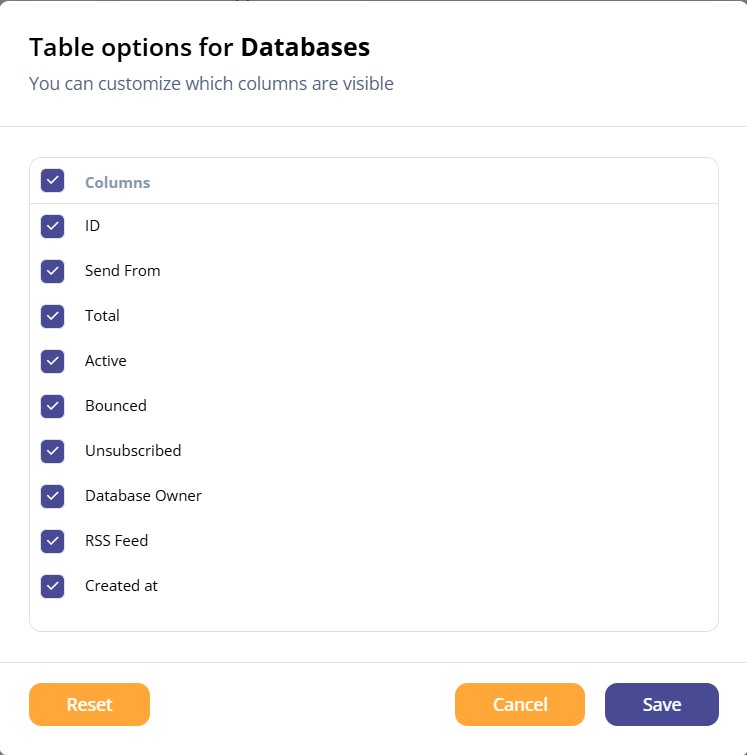
The Contacts Management page features sections for managing contact audiences including Databases, Lists, Segments, Contacts, Master unsubscribe, and a secondary option under Transient suppression list. These various sections are briefly described below.
- Databases are the primary audience for contact management. At least one database is required in an account. While it's recommended to only have one database, you can create as many as you like if that better serves how you manage your contacts.
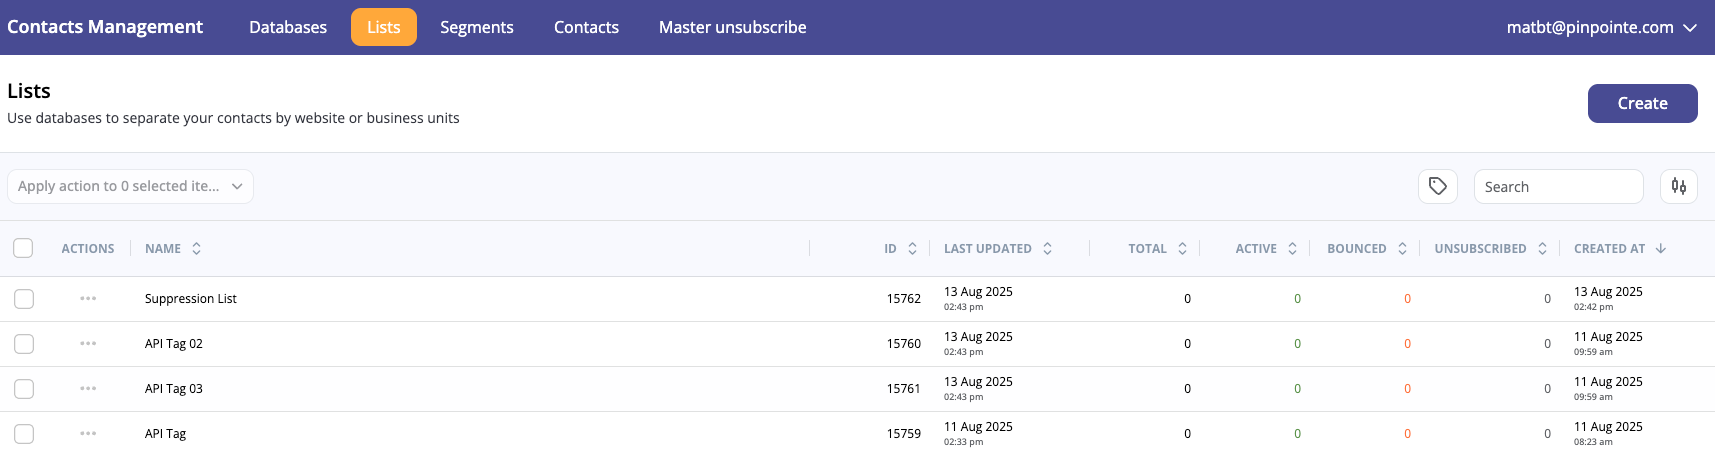
- Lists allow you to further refine your contacts based on custom field values, engagement activity, or can be created at the time of contact import.
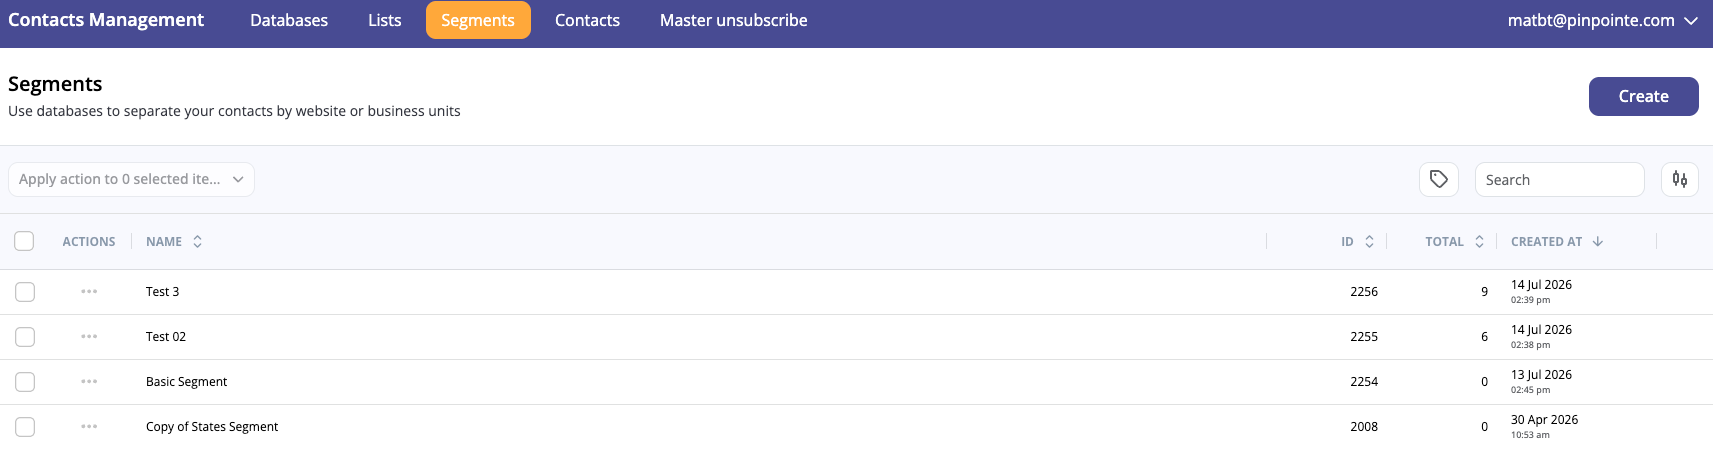
- Segments are dynamic contact audiences created using filter rules that can be modified at any time that let you better manage your contacts by grouping them into more specific groupings.
- The Contacts section allows you to select one or more databases (although we recommend just selecting a single database) that displays all the contacts in the primary pane. You can then apply filter rules using the Filters option to create a group of contacts that meet these filter rulesets. Once you have the preferred filters set, you can then save this filtered audience as a segment.
Note: The Contacts section can also be accessed directly form the main left-hand menu "Contacts" option by clicking "Search".
- Master Unsubscribe displays all contacts who are master unsubscribed for the account. These contacts are blocked from receiving any emails or SMS messages from this account. You may export a CSV file of the displayed contacts by clicking the "Export CSV" button on the top right of the page.
Note: The Master Unsubscribe section can also be accessed directly form the main left-hand menu "Contacts" option by clicking "Master Unsubscribe".

- The Transient Suppression list option may be found in the Databases section near the top left of the page. This feature is discussed in more detail in a separate article.
Note: The Transient Suppression list option can also be accessed directly form the main left-hand menu "Contacts" option by clicking "Transient Suppressions".

Import / Export Queues
The Import Queue & Export Queue menu options under the main Contacts menu feature the queues for imports and exports, respectively.
- The Import Queue is where you can check the status of import jobs such as importing contacts to a database, and if applicable, also to a list. At the far right of the page, you will see an "ACTION" column. Clicking on the little "eye" icon will bring up a popup graphical report showing the results of the import.

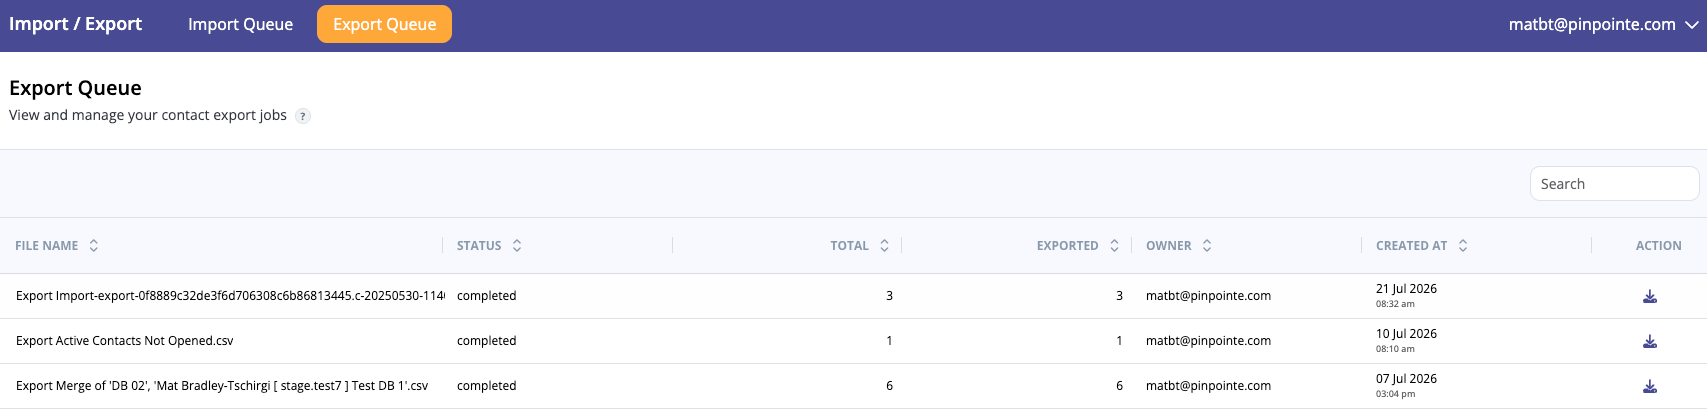
- The Export Queue is where you can check the status of export jobs such as exporting contacts from a database, list or segment. At the far right of the page, you will see an "ACTION" column. Clicking on the little "down arrow" icon will download a CSV file of your export to your local system.
Email Messages
Clicking on the primary "Messages" option on the main left-hand menu will reveal a dropdown with several options, including "Create Email Messages", "Manage Email Messages", "Email Message Queue", "Create SMS Message", and "Manage SMS Messages". Selecting any of these options will take you to the appropriate page to manage the manage the respective function.
Please note the new structure that is consistent across all impacted pages.
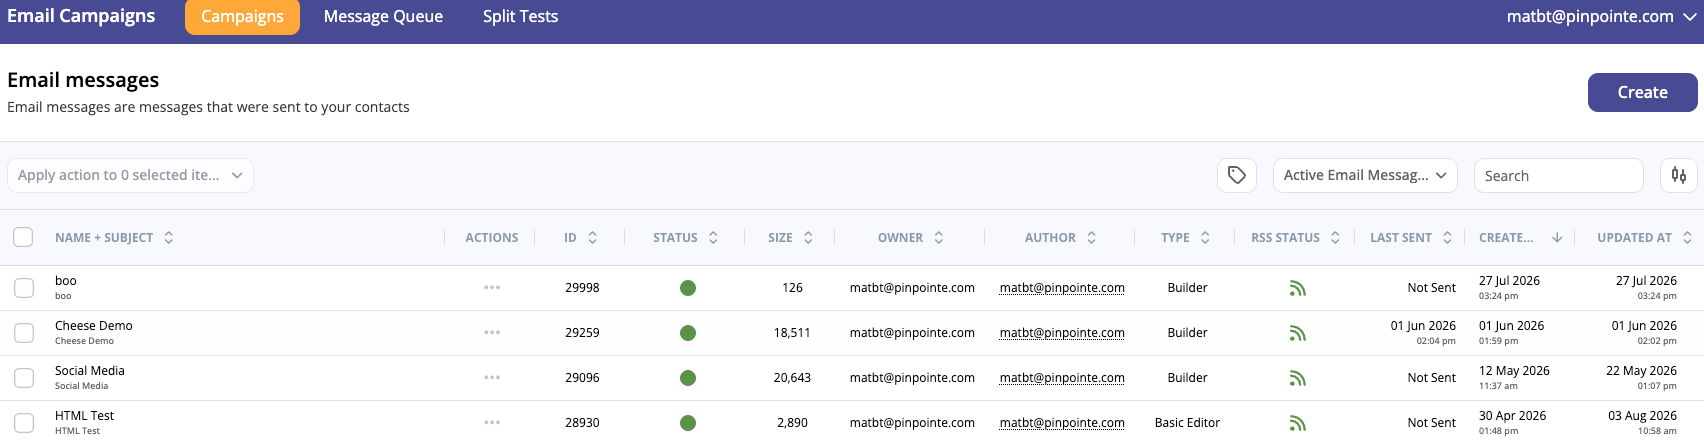
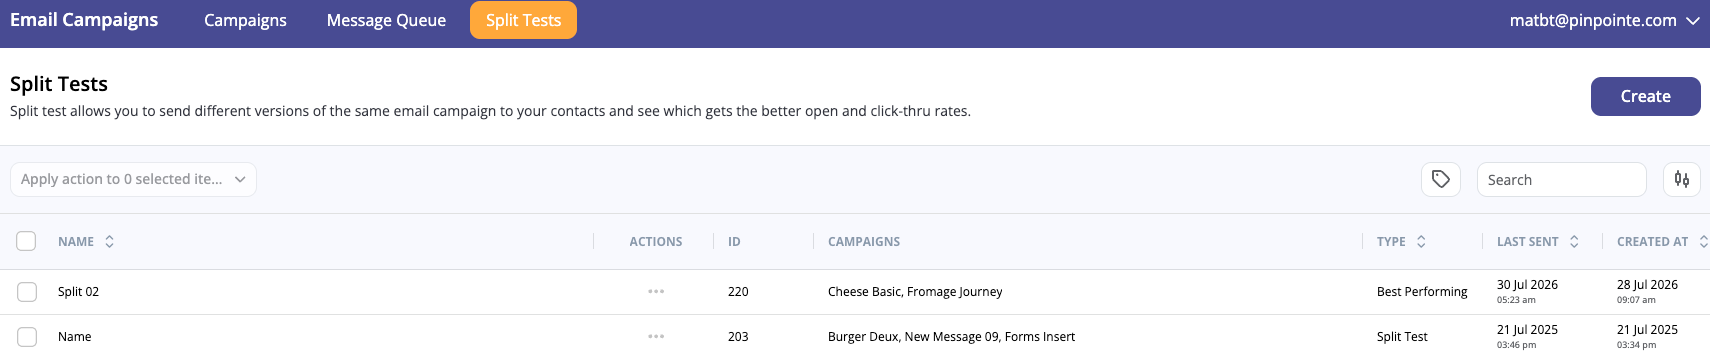
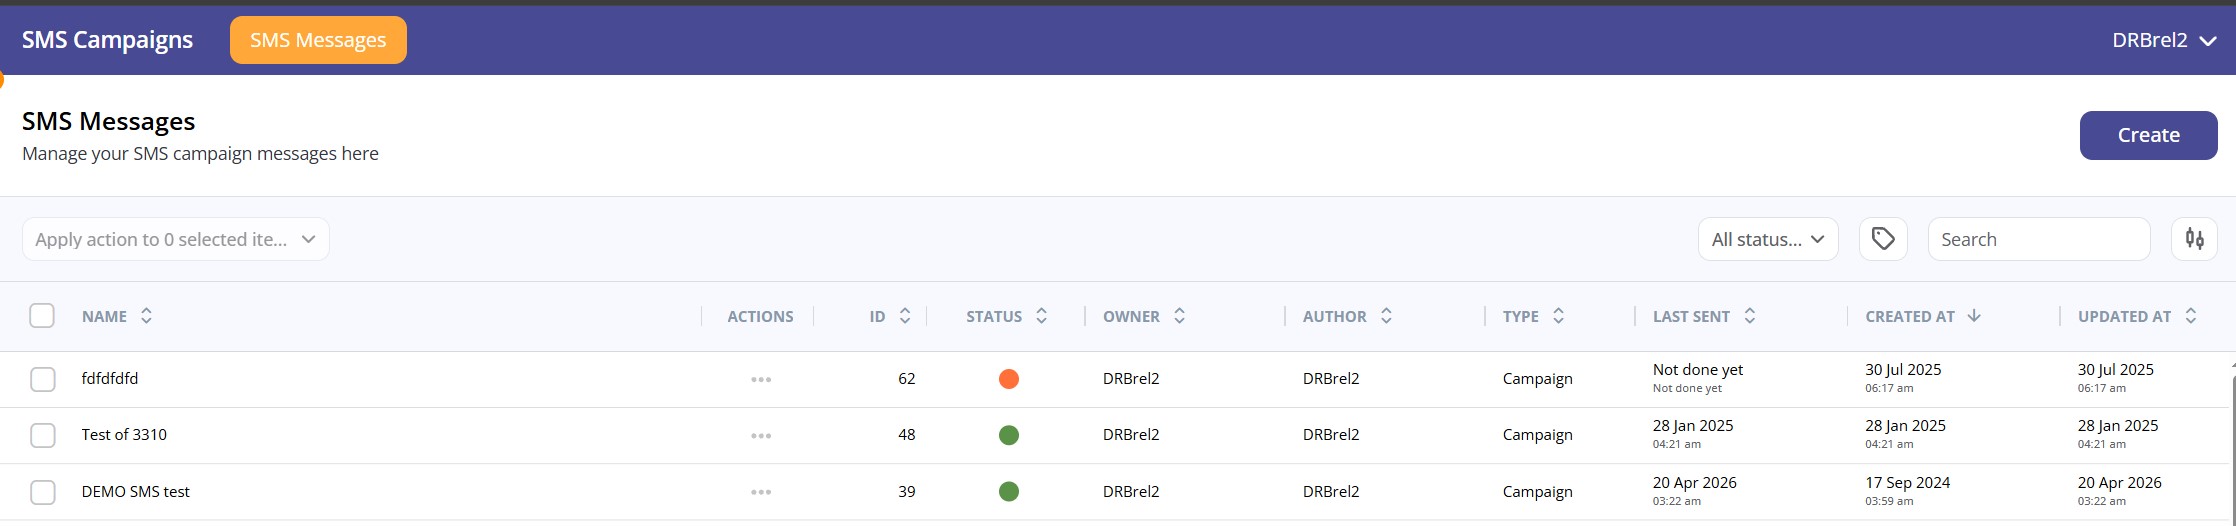
- As with Contacts Management, the Email Campaigns and SMS Campaigns sections will show an "ACTIONS" column near the far left of the page. To access the available menu options under this column, click the three horizontal dots next to the name of the campaign, split test, or SMS message depending on what section you are in.
- The campaign, split test, and SMS message ID is now readily available under its own column.
- By clicking on the small "tag" icon near the top right of the page, you may toggle the "Labels" panel open. You may then select a label, and the campaigns, split tests or SMS messages that have been assigned that label will populate the main panel.
- Just to the right of the "tag" icon is a drop down that lets you select which campaigns / SMS messages or send queue statuses will be shown in the primary pane.
- At the top right of the page, just to the right of the "Search" input field, you will see an icon that looks like two vertical sliders. Clicking that lets you choose which columns will be visible on the page.
Note: Clicking on the "Create Email Message" option under the main "Messages" menu will redirect you to the existing campaign creation screen that allows the user to select either the Drag & Drop Builder or the Basic Editor. These pages will be updated to the new UI at a future date.
Email Campaigns
Clicking on the "Manage Email Messages" option on the main left-hand menu will take you to the Email Campaigns page, which features sections for managing campaign, including sections for Campaigns, Message Queue, and Split Tests. These various sections are briefly described below.
- The Campaigns page is very similar to the legacy UI, and presents a chronological list of all campaigns created. You may also directly access the Builder and Editor directly form this page via the "Create" button.
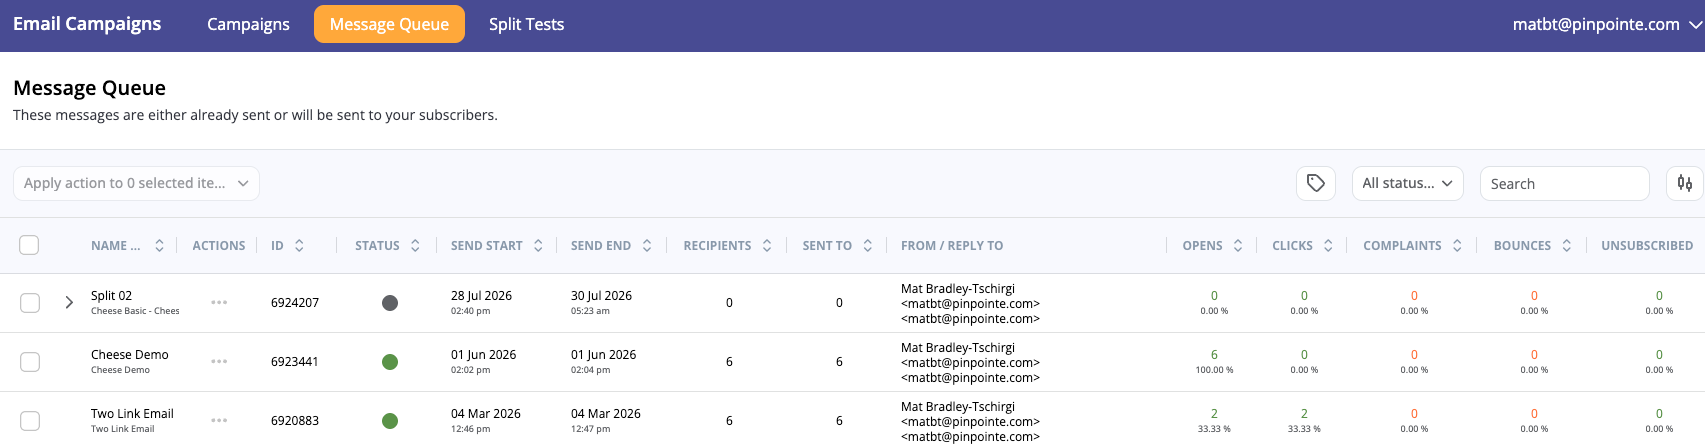
- The Message Queue section displays a chronological list of all emails scheduled to be sent, in process of being sent, or finished sending. This section also provides a summary overview of current counts for unique opens, total clicks, complaints, bounces and unsubscribes.
Note: The Message Queue option can also be accessed directly form the main left-hand menu "Messages" option by clicking "Email Message Queue".
- The Split Tests section allows you to create split tests and displays a chronological list of all split tests deployed.
SMS Messages
Clicking on the "Create SMS Message" or "Manage SMS Messages" options on the main left-hand menu dropdown will take you to the SMS Campaigns section which allows you to create and manage your SMS messages on the SMS Messages page.
- The SMS Messages page displays a chronological list of all emails scheduled to be sent, in process of being sent, or finished sending. The page also includes, among other information, the SMS message ID and the status of the send denoted by a colored circle with additional textual information when you roll over the icon.
For more detailed information on each item described above, please review the appropriate Knowledge Base article in the Support portal.