The Contacts page can be found in the Contacts Management section. The Contacts page allows you to perform several functions:
- Select a database, then perform various operations on the displayed contacts. This includes using filters to refine your targeted contact population.
- Save the resulting population as a new Segment based on the selected filters
- Perform numerous functions from the "Apply action" dropdown on one or more of the displayed contacts
NOTE: It is highly recommended you read the "New UI Basic Functions Overview" article first, as it provides an overview of all Pinpointe audience types and how the various pages and sections are accessed and structured.
TABLE OF CONTENTS
- Selecting a Database Population
- Saving as a Segment
- Apply Action
- Bulk Actions
- Table Options
- Column Controls
There are several ways to access the Contacts page in the Contacts Management section.
- Select the "Search" option under the main "Contacts" menu. This will take you directly to the Contacts page.
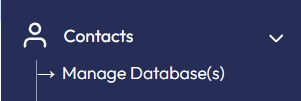
- Select the "Manage Database(s)", "Manage Lists", "Manage Segments", or "Master Unsubscribe" options under the main "Contacts" menu. This will take you directly to the respective page, where you can then select Contacts. Ex: Selecting "Manage Segments":

Selecting a Database Population
To select a database, click on the "Databases" button near the top right of the page:
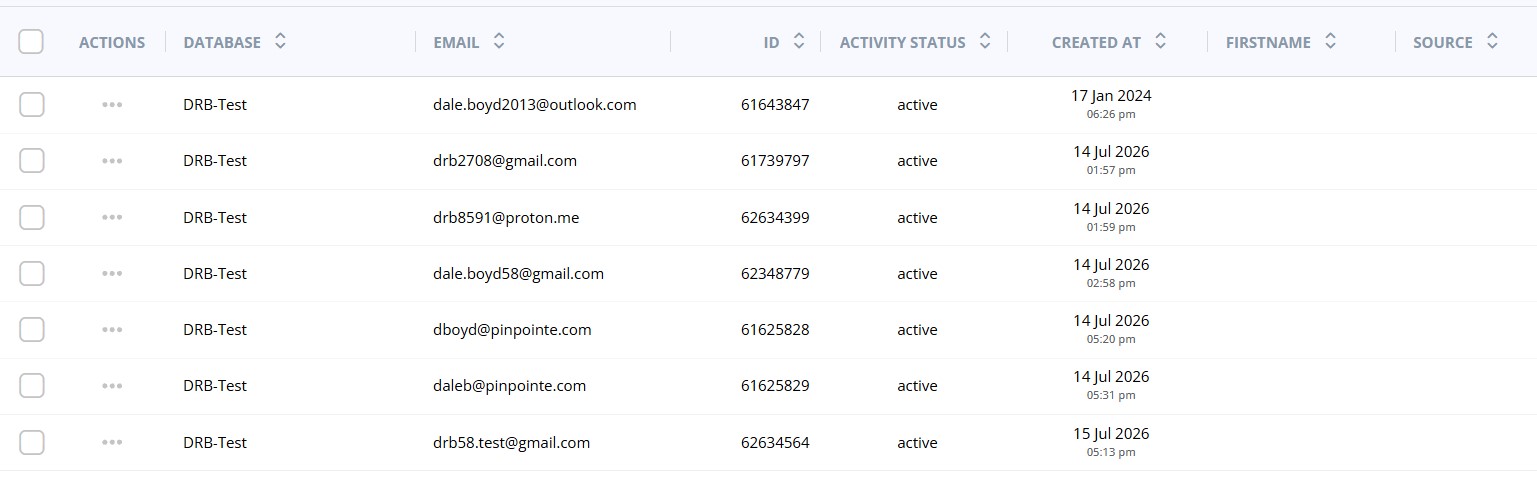
This will open a pane on the right side of the page. Within this pane you can select one or more databases. Once selected, click the "Save" button and all the contacts in the database(s) will be displayed on the Contacts page. Ex:
You can refine the population by clicking on the "Filters" button at the top right:
Ex:
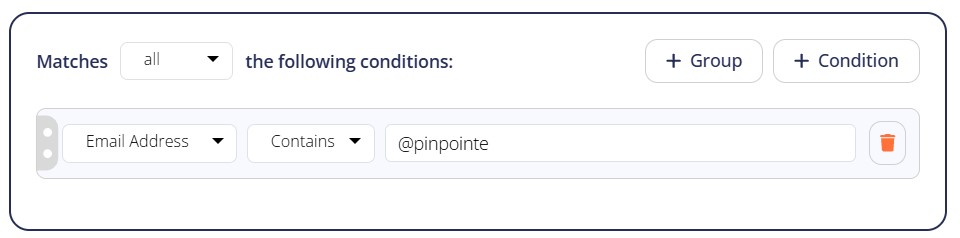
Clicking the "Count" button will show you the contact count for the resulting population.
Once you are finished, click the "Save" button. Your refined contact population will now appear on the Contacts page:

You now can save the refined population as a segment OR perform of the actions offered in the "Apply action" dropdown list.
Saving as a Segment
To save the refined population as a segment, click the "Save as segment" button:
This will open a right-side pane where you can give your new segment a name. Once you have named it, click the "Save" button and you will be back on the Contacts page.
You will note that the button has now changed to "Update segment", which allows you to edit the segment name only. The segment filter structure can be modified in the Segments page if necessary.
Apply Action
The "Apply Action" dropdown is near the top left. You can apply an action from the drop down list to one or more contacts depending on how many are selected via the checkbox on the far left column. The available actions are fairly self-explanatory, but should you need assistance, please contact Pinpointe Support.
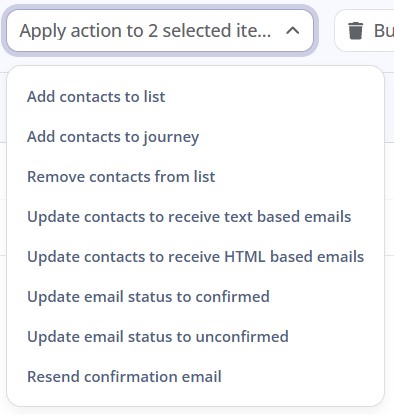
Here is a brief description of the various actions:
- Add contacts to list - add the selected contacts to one or more lists
- Add contacts to journey - add selected contacts to one or more journeys
- Remove contacts from list - delete the selected contacts from the refined population displayed on the Contacts page
- Update contacts to receive text based emails - update selected contacts to receive text-based emails
- Update contacts to receive HTML based emails - update selected contacts to receive HTML-based emails emails
- Update email status to confirmed - update the selected contacts to confirmed in the targeted database
- Update email status to unconfirmed - update the selected contacts to unconfirmed in the targeted database
- Resend confirmation email - resend a confirmation email to the selected contacts
Bulk Actions
You can perform several bulk actions by clicking on the "Bulk Actions" button:
Clicking on the button brings up a pane on the right-side of the page:
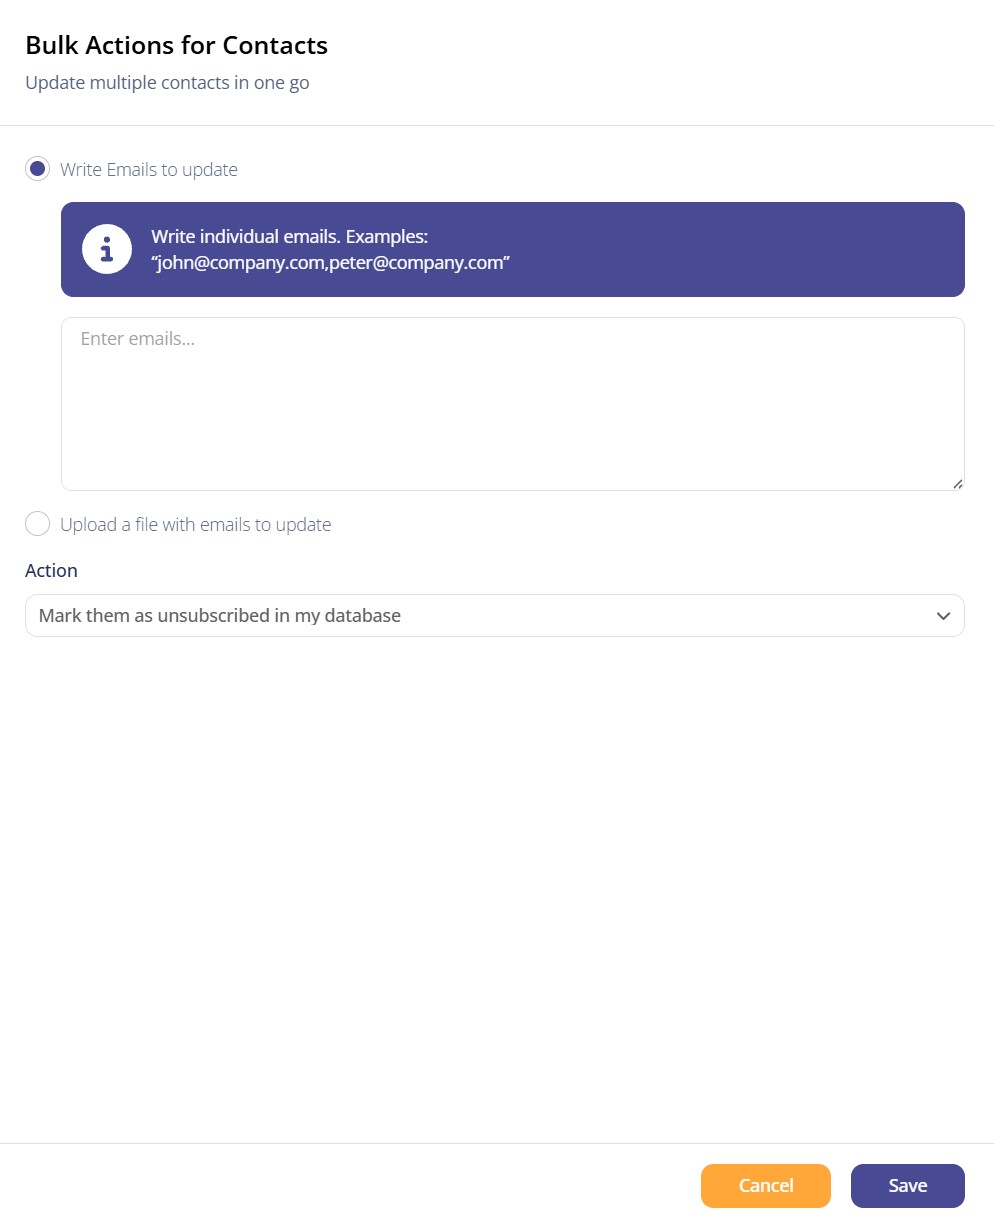
- You can manually enter a list of comma-separated email addresses. This is best used for smaller number of emails.
- You can check the circular checkbox and the pane will now display a dashed file import box. You can drag your CSV file in from your local file structure OR locate the file in your local system and select it.
- In either scenario, you can click the dropdown just under the "Action" text and select one of several options:
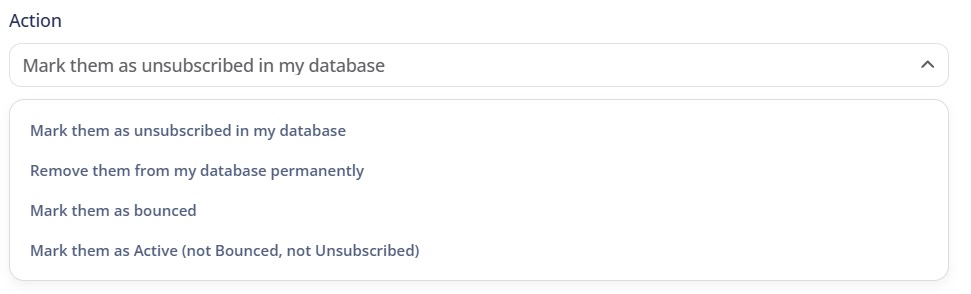
Here is a brief description of each action:
- Mark them as unsubscribed - changes the status of the contacts to unsubscribed in the target database
- Remove them from my database permanently - deletes the contacts from your target database
- Mark them as bounced - changes the status of the contacts to bounced in the target database
- Mark them as Active not Bounced, not Unsubscribed) - changes the status of the contacts to active in the target database
Once you have made your selection, click the "Save" button.
Table Options
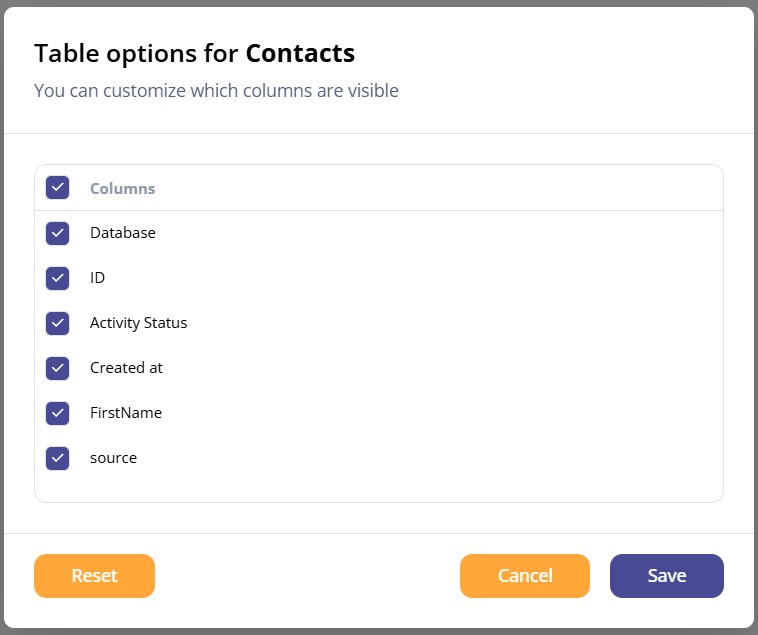
Clicking the small "slider" icon at the far top right of the page brings up a modal that allows you to select which columns will be viewable when viewing the page.

Column Controls
- The ACTIONS column allows you to select from a series of options shown in a dropdown list. Select the contact you wish to work with, then click the three horizontal dots icon in the ACTIONS column for that contact.
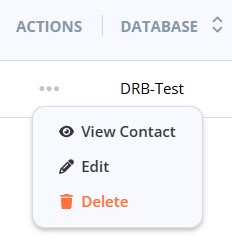
Here is a brief description of each action:
- View Contact displays the Contact Details modal comprised of four panes
- Information
- Lists
- Logs
- Notes
- Edit displays the Edit a contact modal comprised of two panes
- Information
- Lists
- Delete lets you delete the contact form he target database
Additional columns on the Databases page are:
- DATABASE - name of your target database
- EMAIL- contact's email address
- ID - the subscriber ID of the contact (This is database-specific)
- ACTIVITY STATUS - active, unsubscribed or bounced
- CREATED AT- displays the timestamp of when this contact was created in the database
- <Custom Fields> - all visible custom fields and their per-contact values