Journeys are automated message that send based on specific subscriber interactions.
TABLE OF CONTENTS
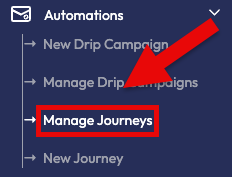
In the New UI, the best way to get to Journeys is through Automations -> Manage Journeys in the navigation menu on the left (Fig 1).
Fig 1
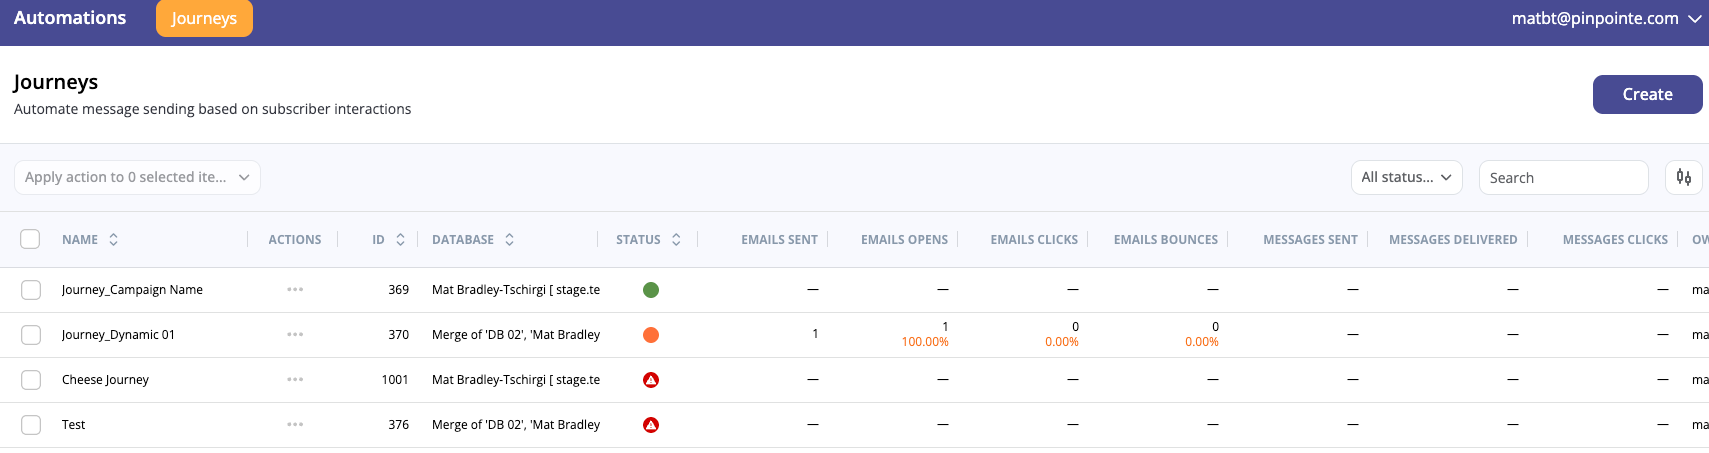
Now that we're on the Journeys page, there's a variety of things we can do (Fig 2).
Fig 2
Creating New Journey
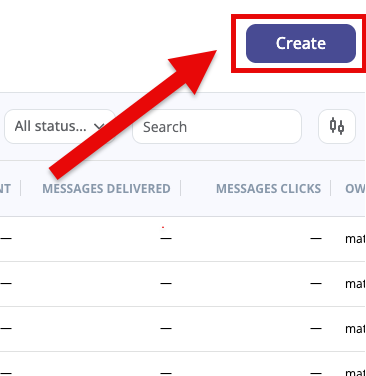
Let's start by creating a Journey by clicking on the Create button in the upper right (Fig 3).
Fig 3
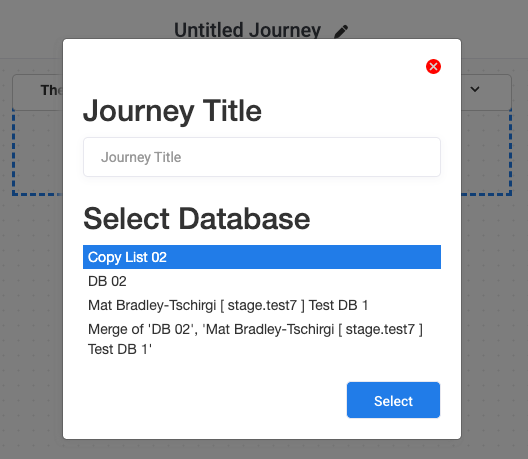
This will bring up the Journey Builder (Fig 4).
Fig 4
To learn more about building a Journey, you can start by reading this Journey - Entrant Events article.
On the Journeys screen, there are a few notable actions you can take (Fig 5):
- Apply Actions can be applied to one or more databases depending on how many are selected via the checkbox on the far left column.
- Actions apply to individual databases after the "..." icon is clicked.
Fig 5
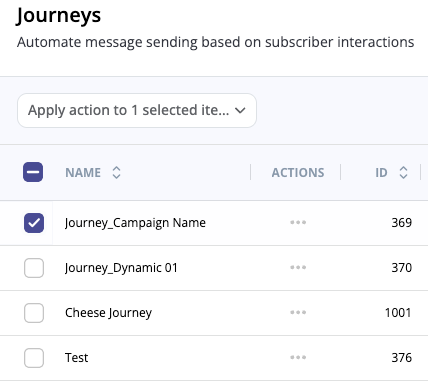
Other than Actions, there are also default columns you should be aware of:
- Name is the name of your Journey.
- ID is the ID number for the Journey.
- Database is the name of the database your Journey applies to.
- Status is the status of your Journey (Active, Suspended, Has Unresolved Errors)
- Emails Sent is the total number of emails sent from the Journey.
- Emails Opens is the total number of emails opened from the Journey.
- Emails Clicks is the total number of emails clicked from the Journey.
- Emails Bounces is the total number of emails bounced from the Journey.
- Messages Sent is the total number of SMS messages from the Journey.
- Messages Delivered is the total number of SMS messages delivered from the Journey.
- Messages Clicks is the total number of SMS messages clicked from the Journey.
Apply Actions
After selecting one or more databases via the checkboxes on the left-most column, clicking the Apply Actions drop-down menu gives you access to the several actions (Fig 6).
Fig 6
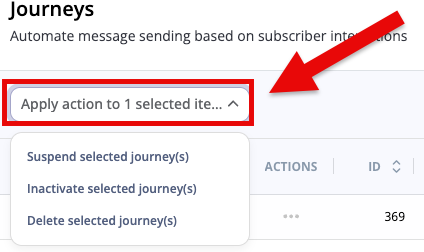
Here are the actions you can take from that menu:
- Suspend selected journeys changes the status to Suspend for the Journeys you've selected.
- Inactivate selected journeys changes the status to Inactive for the Journeys you've selected.
- Deleted selected journeys deletes the Journeys you've selected.
Actions
Clicking the "..." icon in the Actions column pulls up a different set of actions you can do to your database (Fig 7).
Fig 7
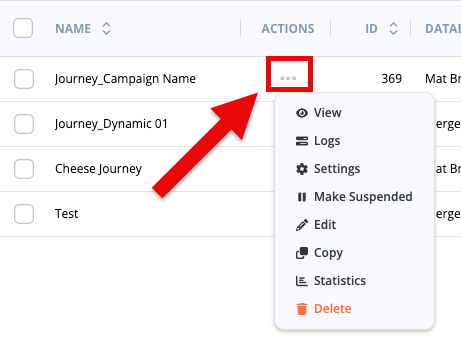
Here are the actions you can take from that menu:
- View lets you view your Journey.
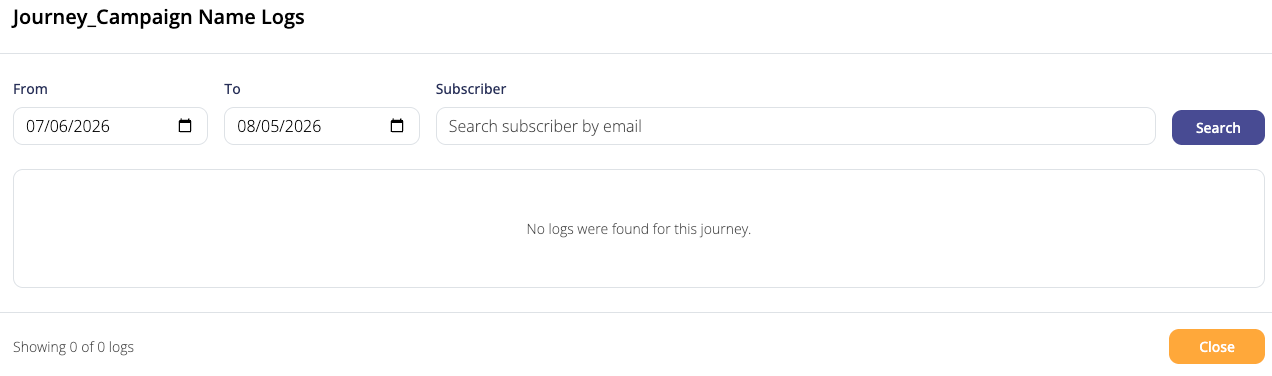
- Logs opens a Journey Logs modal that lets you search for logs filtering by date and by subscriber.
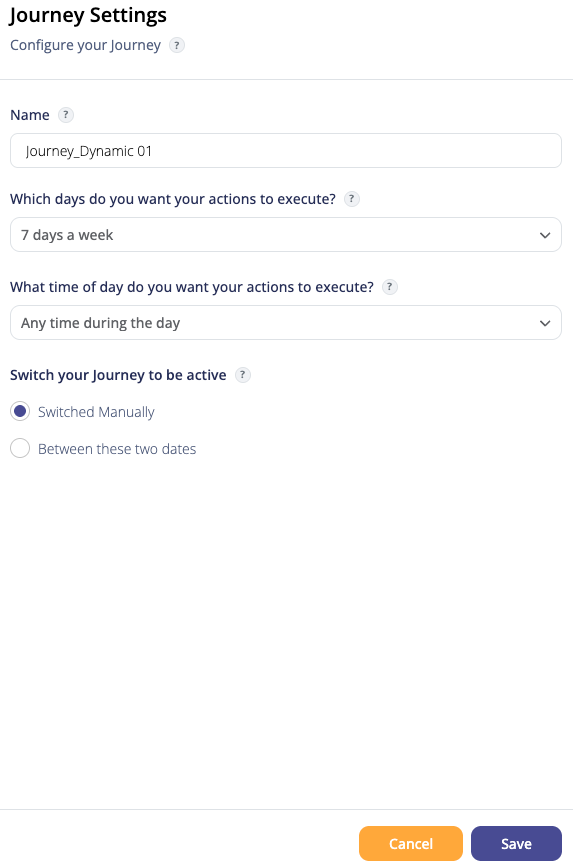
- Settings brings up the Journey Settings modal that allows you to configure when your Journey's actions execute.
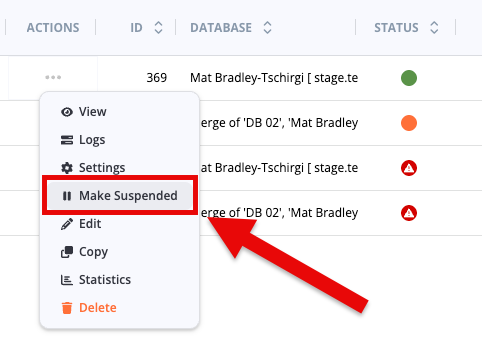
- Make Suspended changes your Journey's status to Suspended. If a Journey is already Suspended, instead in the Actions menu you'll see Activate and Make Inactive. which makes your Journey's status change to Active or Inactive, respectively.
- Edit lets you edit your Journey.
- Copy creates a duplicate of your Journey.
- Statistics takes you to the Journey Campaign Statistics page.
- Delete lets you delete your Journey.
Logs
On the Journey Logs modal, you can search for logs relating to your Journey while filtering by a date range and by a subscriber email address (Fig 8).
Fig 8
Journey Settings
Journey Settings let you configure aspects of your Journey (Fig 9).
- Name lets you rename your Journey's name
- Which days do you want your actions to execute? let you toggle how often you want your Journey's actions to occur (7 days a week or Weekdays (Mon-Fri))
- Switch your Journey to be active allows you to toggle between turning it on and off manually (Switched Manually) or between a date range (Between these two dates)
- The Save button lets you save changes to your Journey Settings
- The Cancel button lets you exit your Journey Settings without saving your changes
Fig 9
Journey Statuses
By default, a Journey begins as inactive, as indicated under the column labeled "Status". To the right of the Status column is an unlabeled column that will have one of the following icons:
- If the Journey is inactive, the icon will be red. Placing your cursor over the arrow will show a text popup letting you know that clicking on the arrow will make this Journey active.
- Once a Journey is active, it will be label as such under the Status column, and the icon will be green.
- The icon for a suspended Journey will be a orange.
- Clicking the "..." icon in the Actions column opens a menu which includes "Make Suspended".
- From the suspended mode, a Journey may be made inactive, or made active again through the "..." icon menu in the Actions column. A suspended Journey will be labeled "suspended" under the Status column.
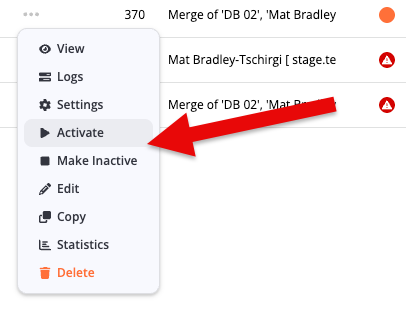
Once reactivated, a suspended Journey will look back from the time it was suspended and evaluate all contacts to determine if they should have been placed in the Journey funnel. It other words, the Journey will play catch-up.
An active Journey made inactive, however, if then re-activated, will NOT go back and evaluate the contacts in the target database from the point it was made inactive. It will only evaluate contacts from the point at which it was reactivated.