In the Pinpointe New UI, importing and exporting contacts to a database, tag list, or segment have a fresh, new look.
Let's go through some examples of each!
TABLE OF CONTENTS
Importing contacts to a database
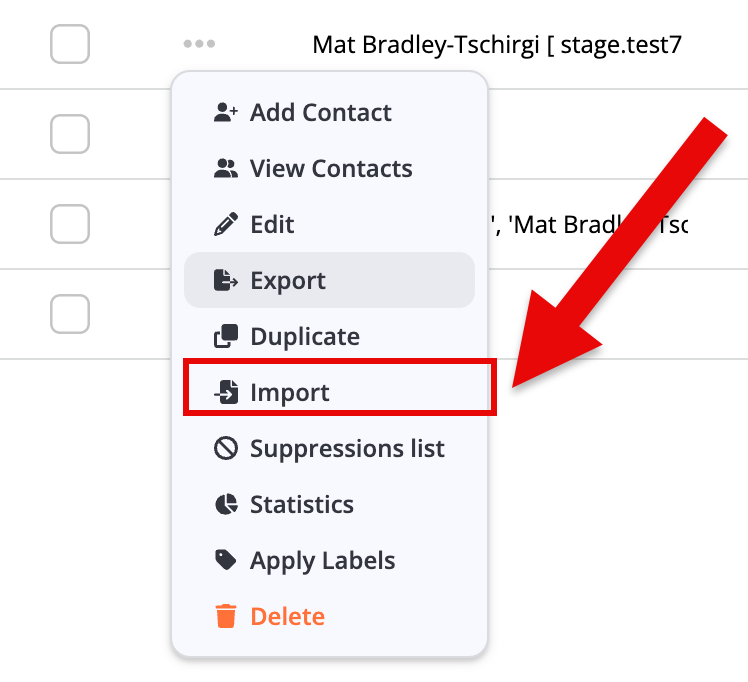
In the Database section, click the "..." icon in the Actions column and click on Import (Fig 1).
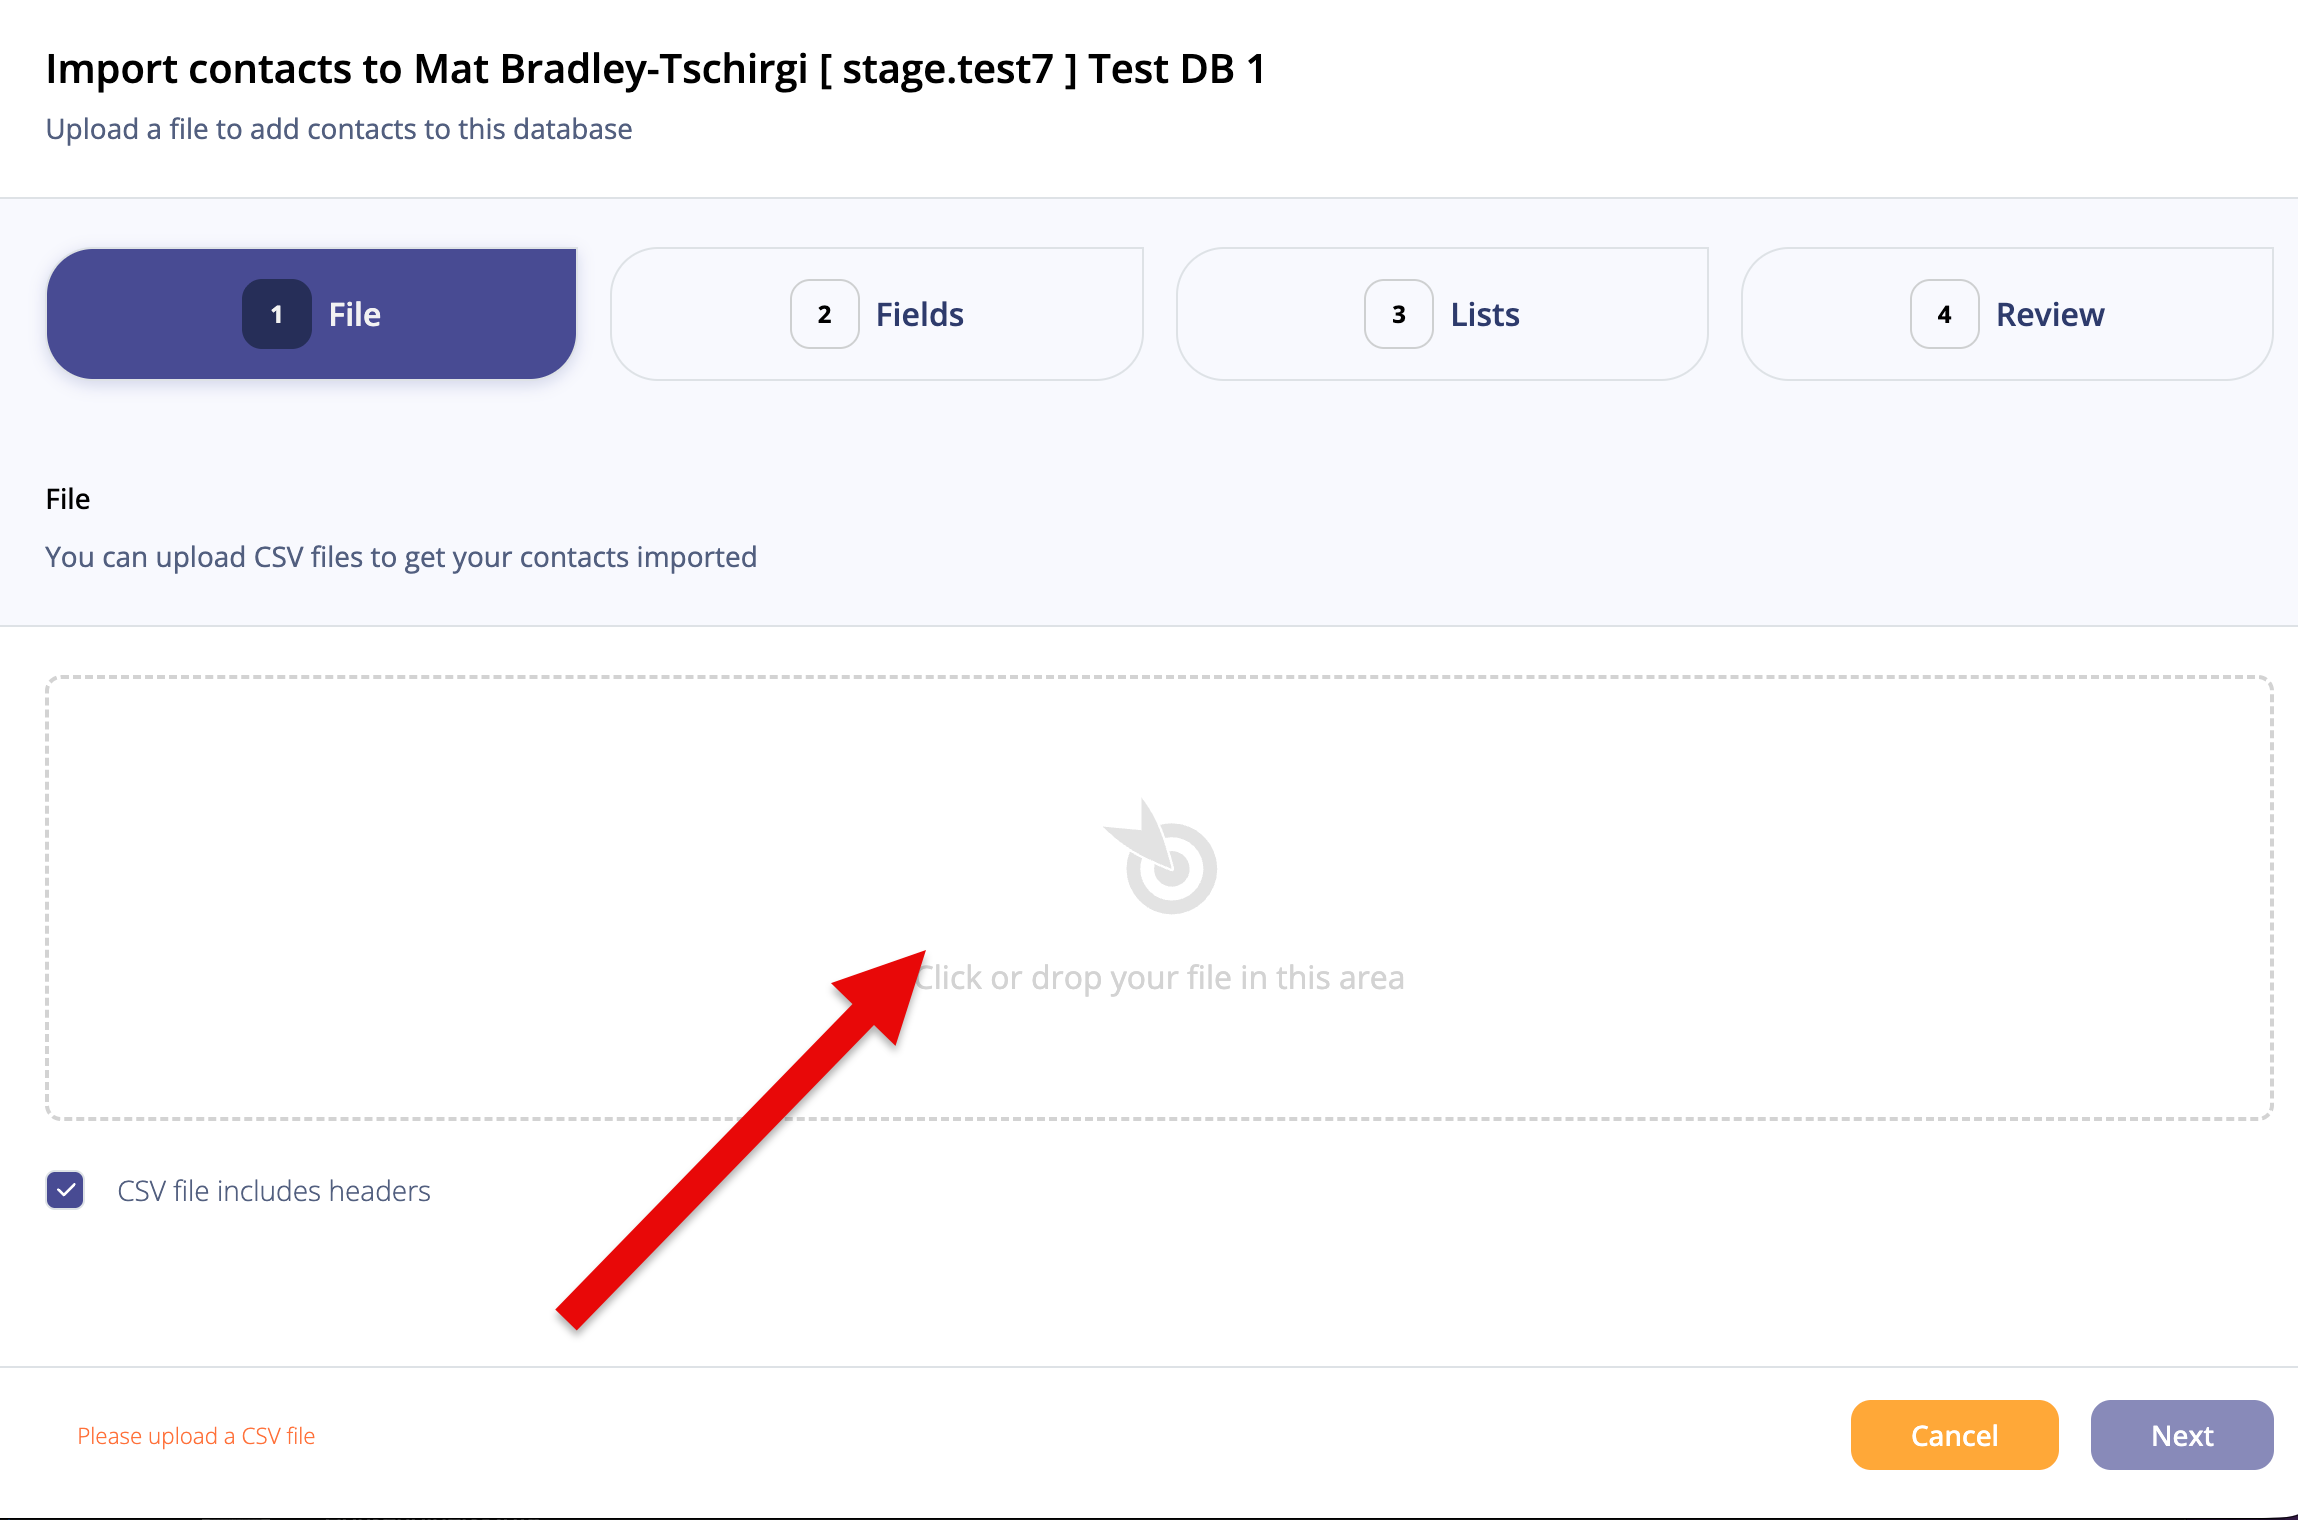
Now you'll see the Import Contacts modal. Drag your file into the file box and then click "Next" to go onto the next step (Fig 2). This will take you to the Fields screen.
Fig 2
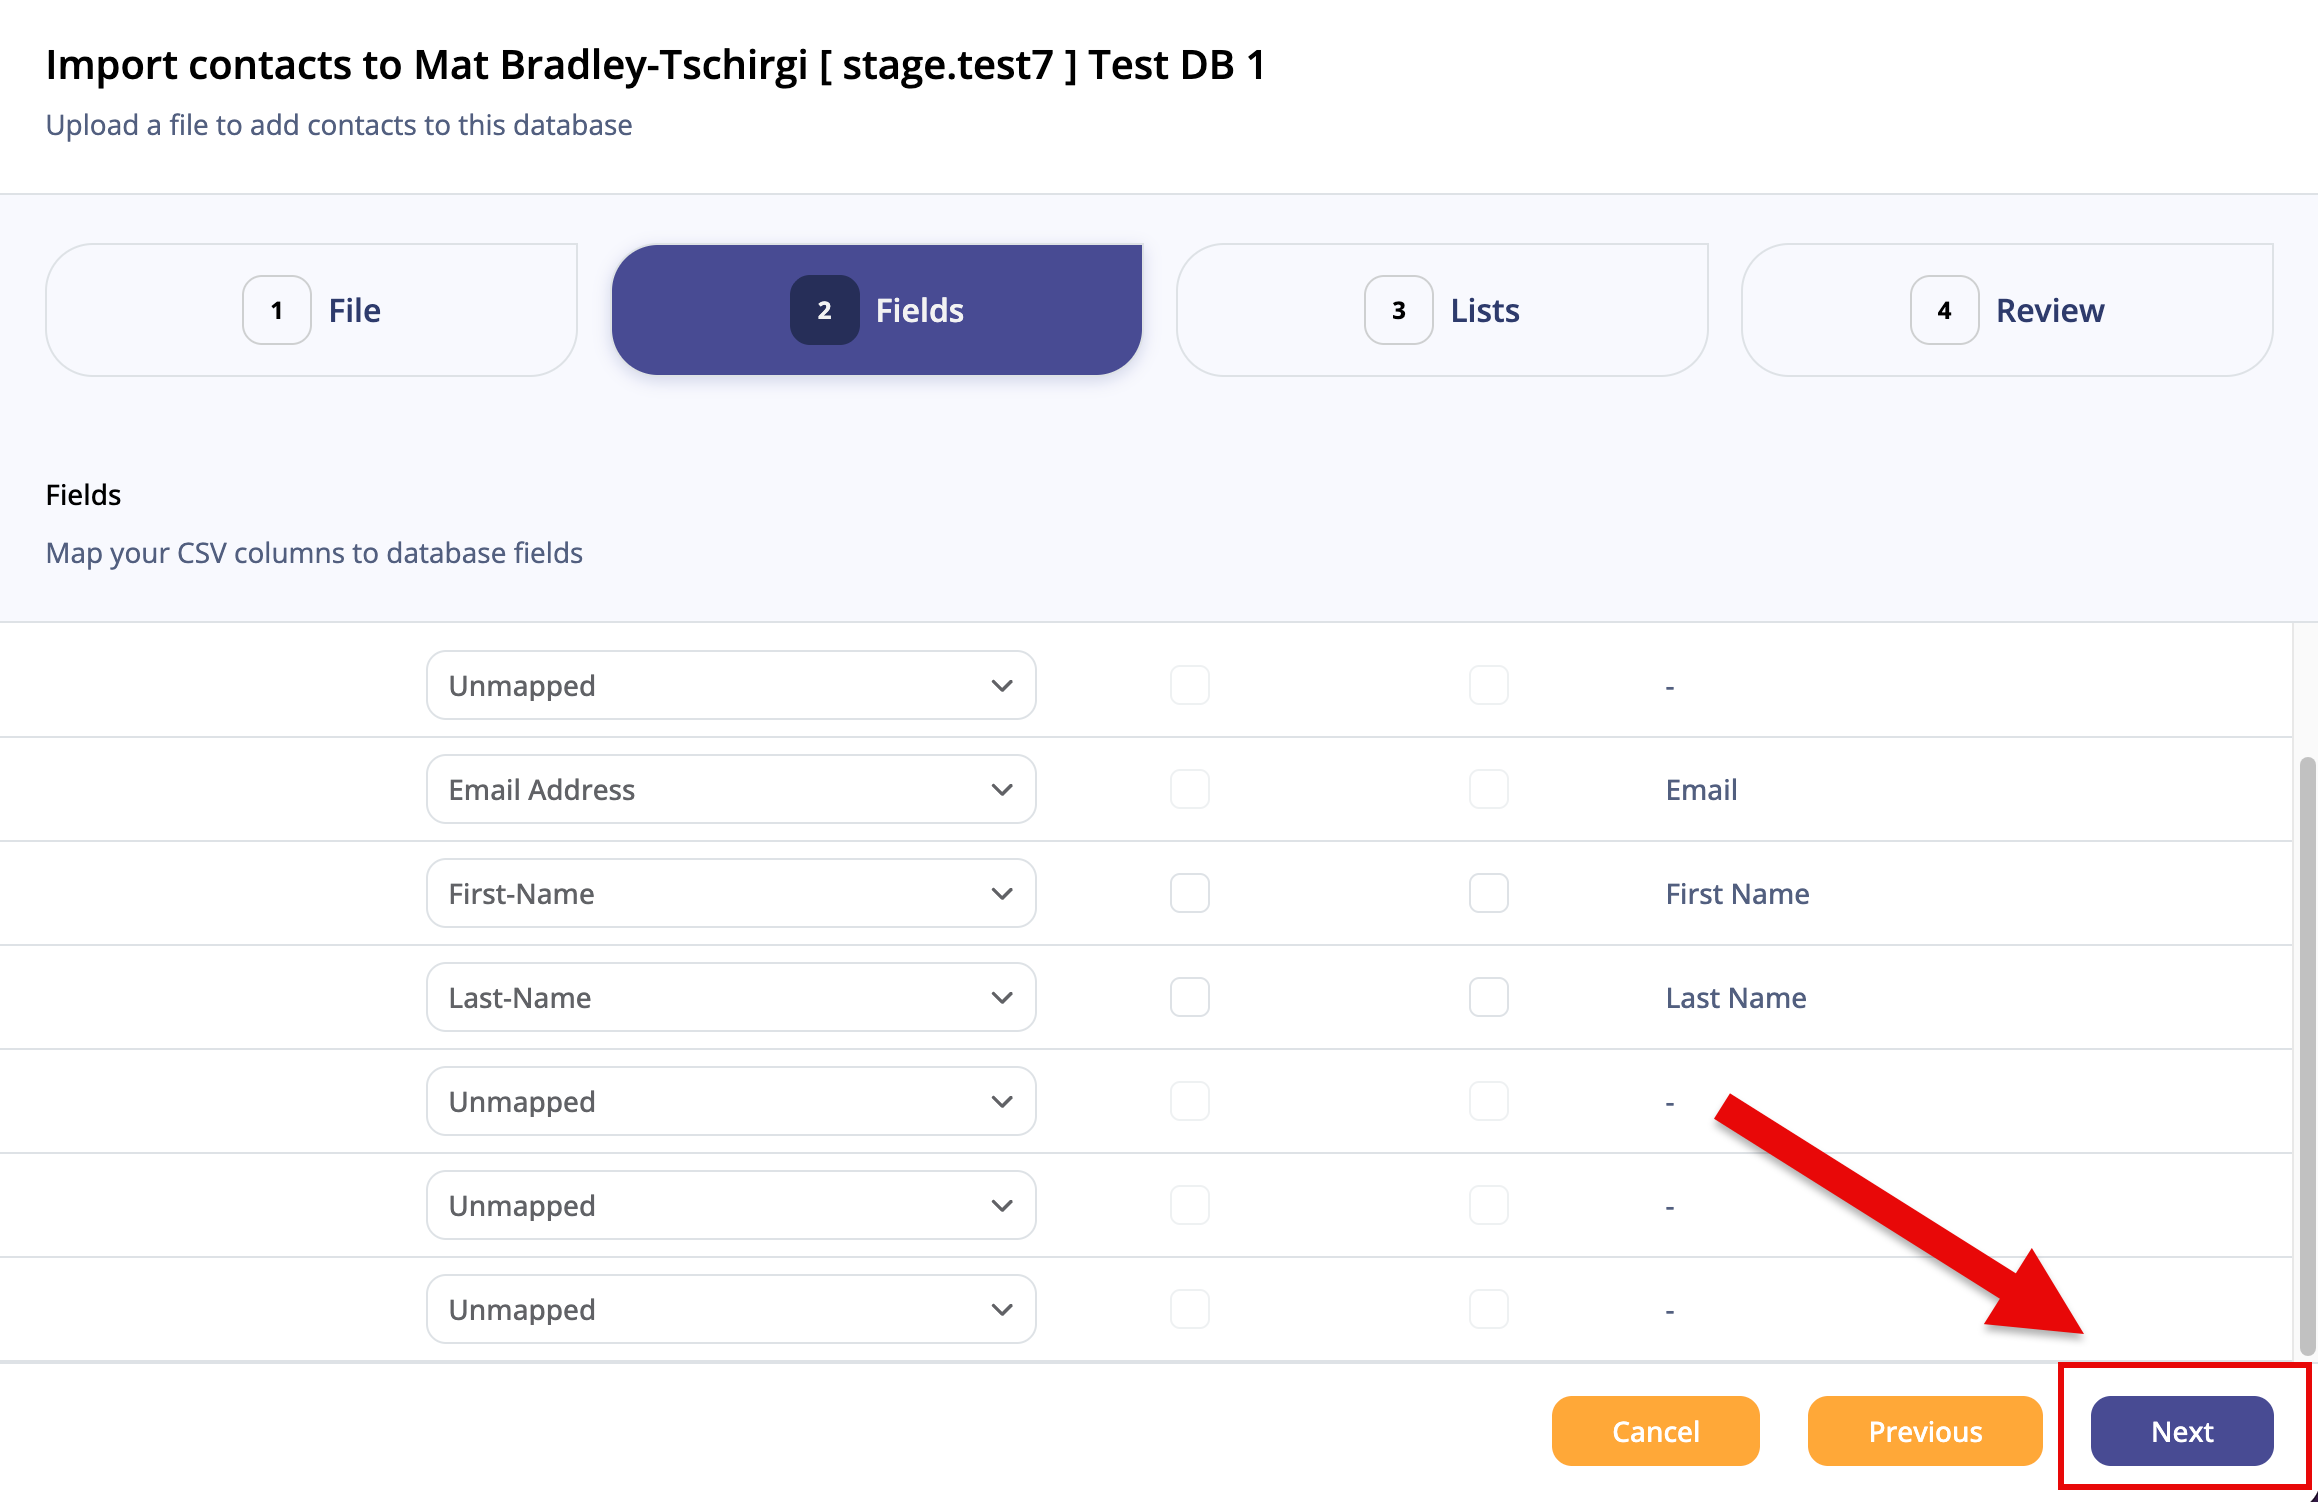
On the Fields screen, assign your fields as needed and then click "Next" (Fig 3). This will take you the Lists page.
Fig 3
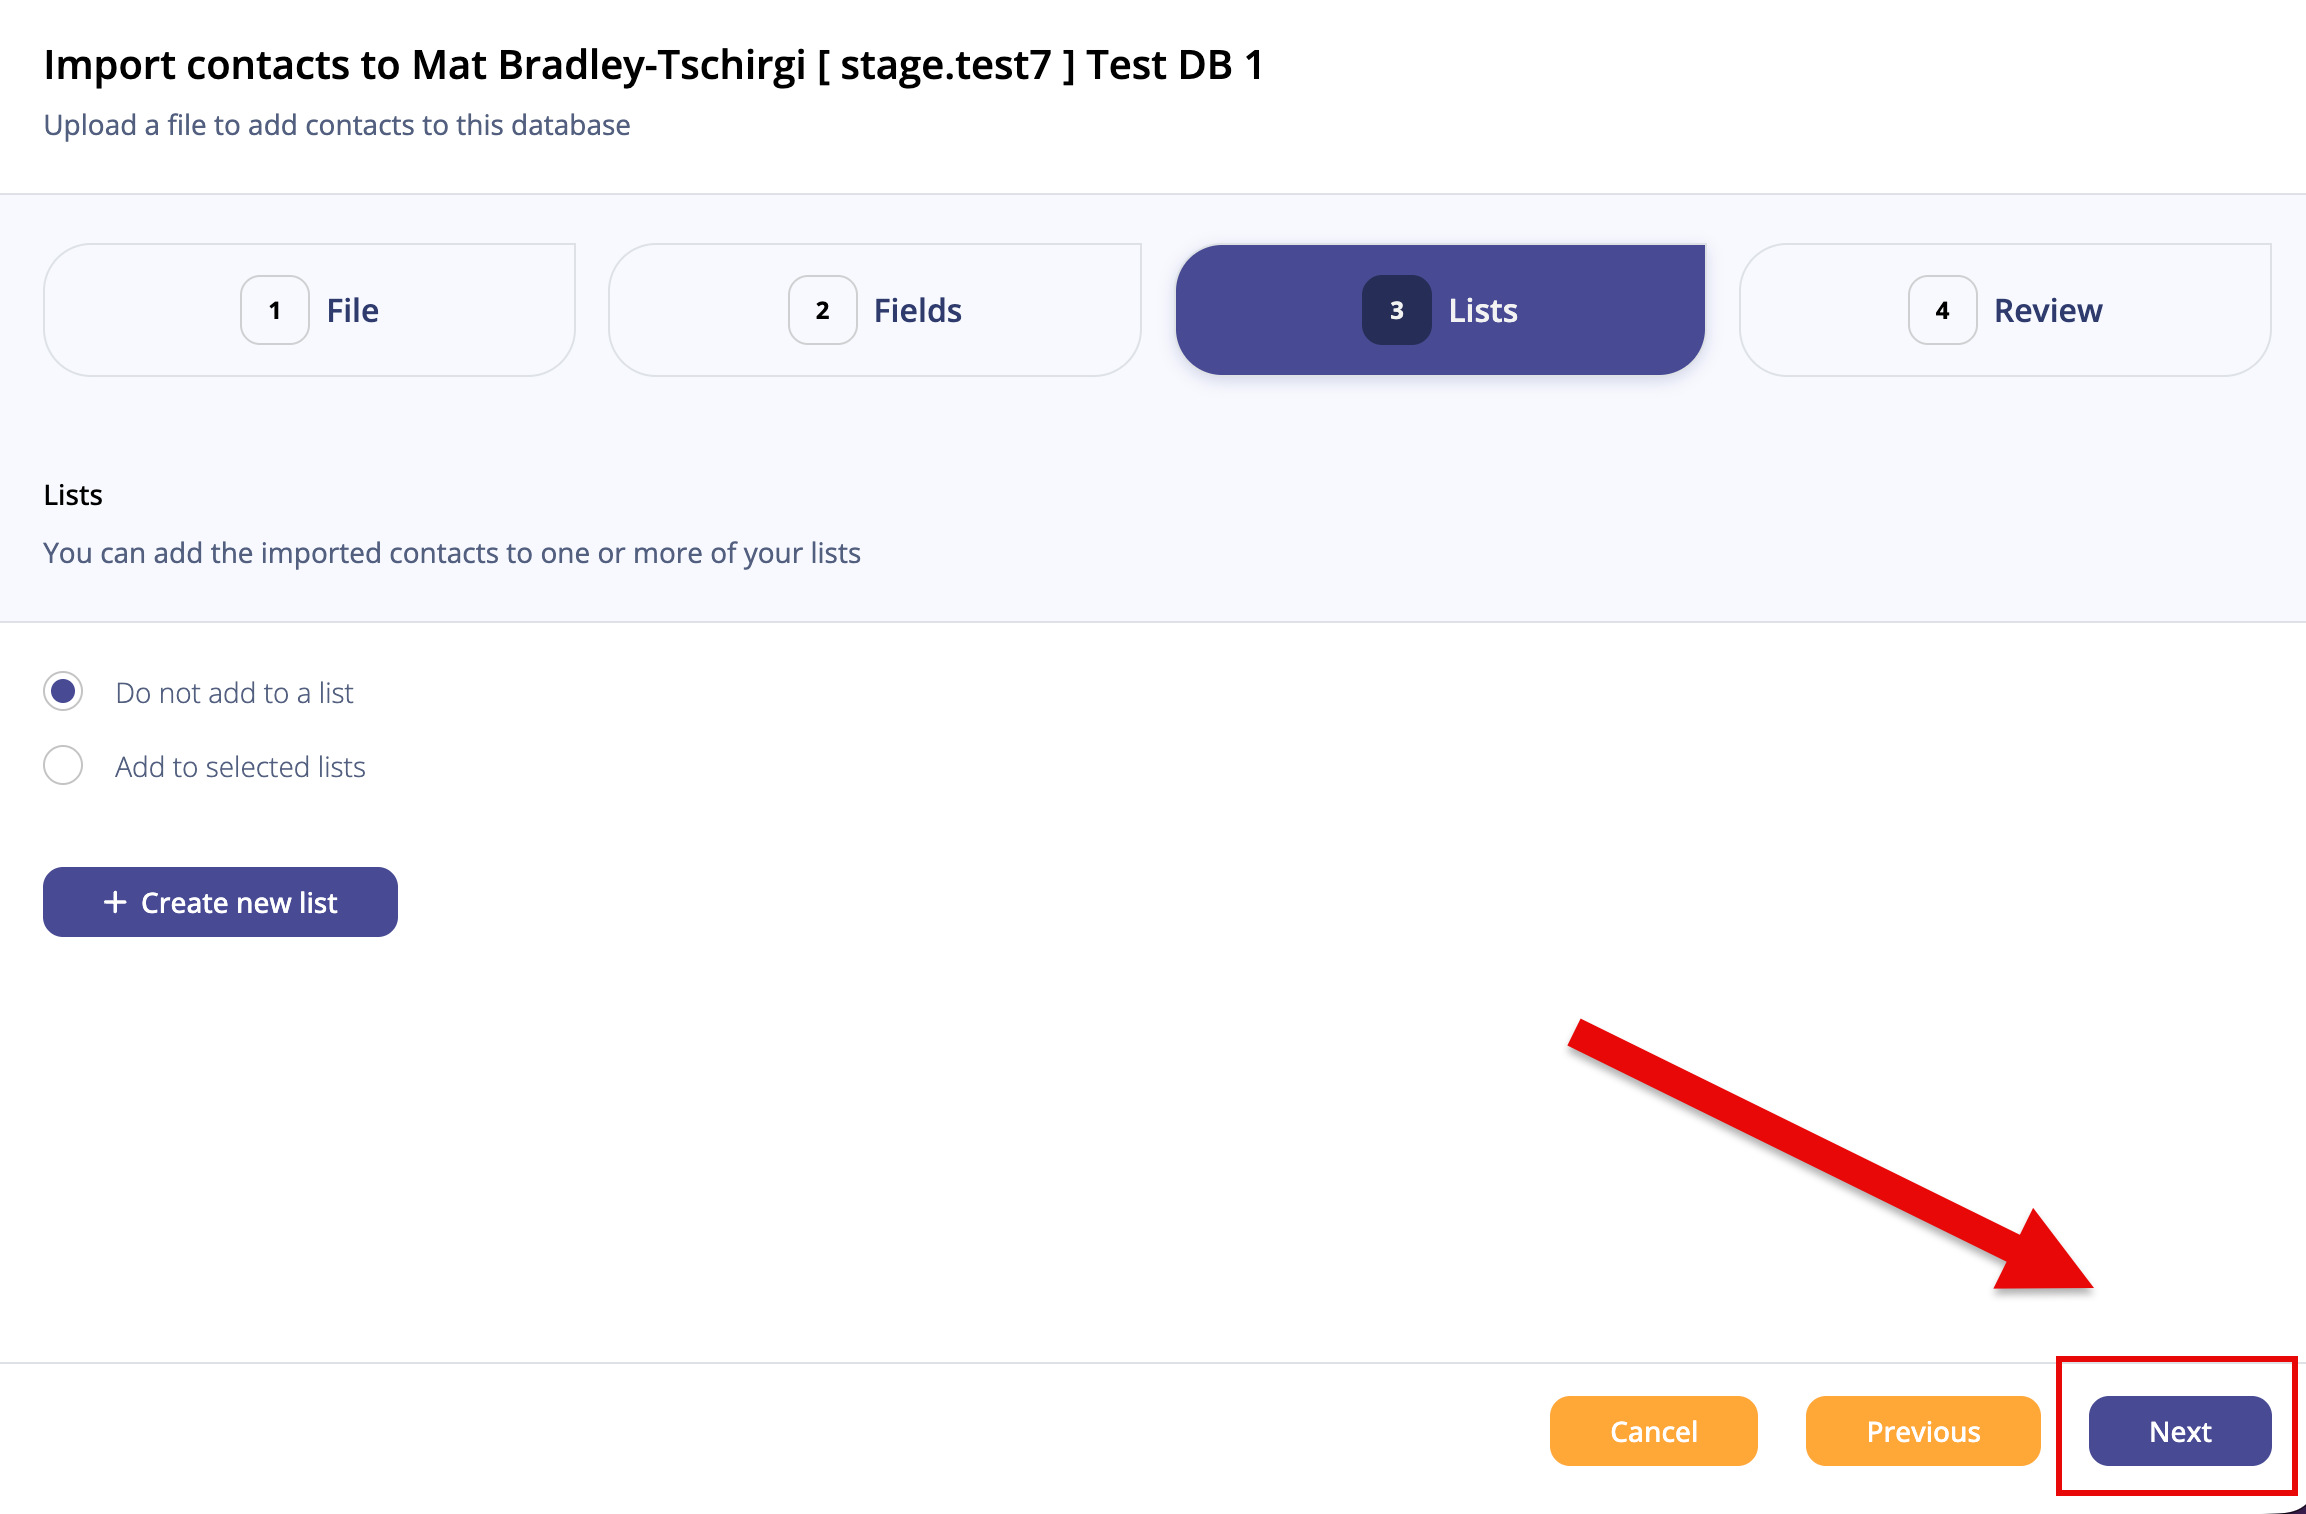
Here, you can choose whether to add your contacts to a list or not (Fig 4). Make your selection and click the "Next" button, which will take you to the Review page.
Fig 4
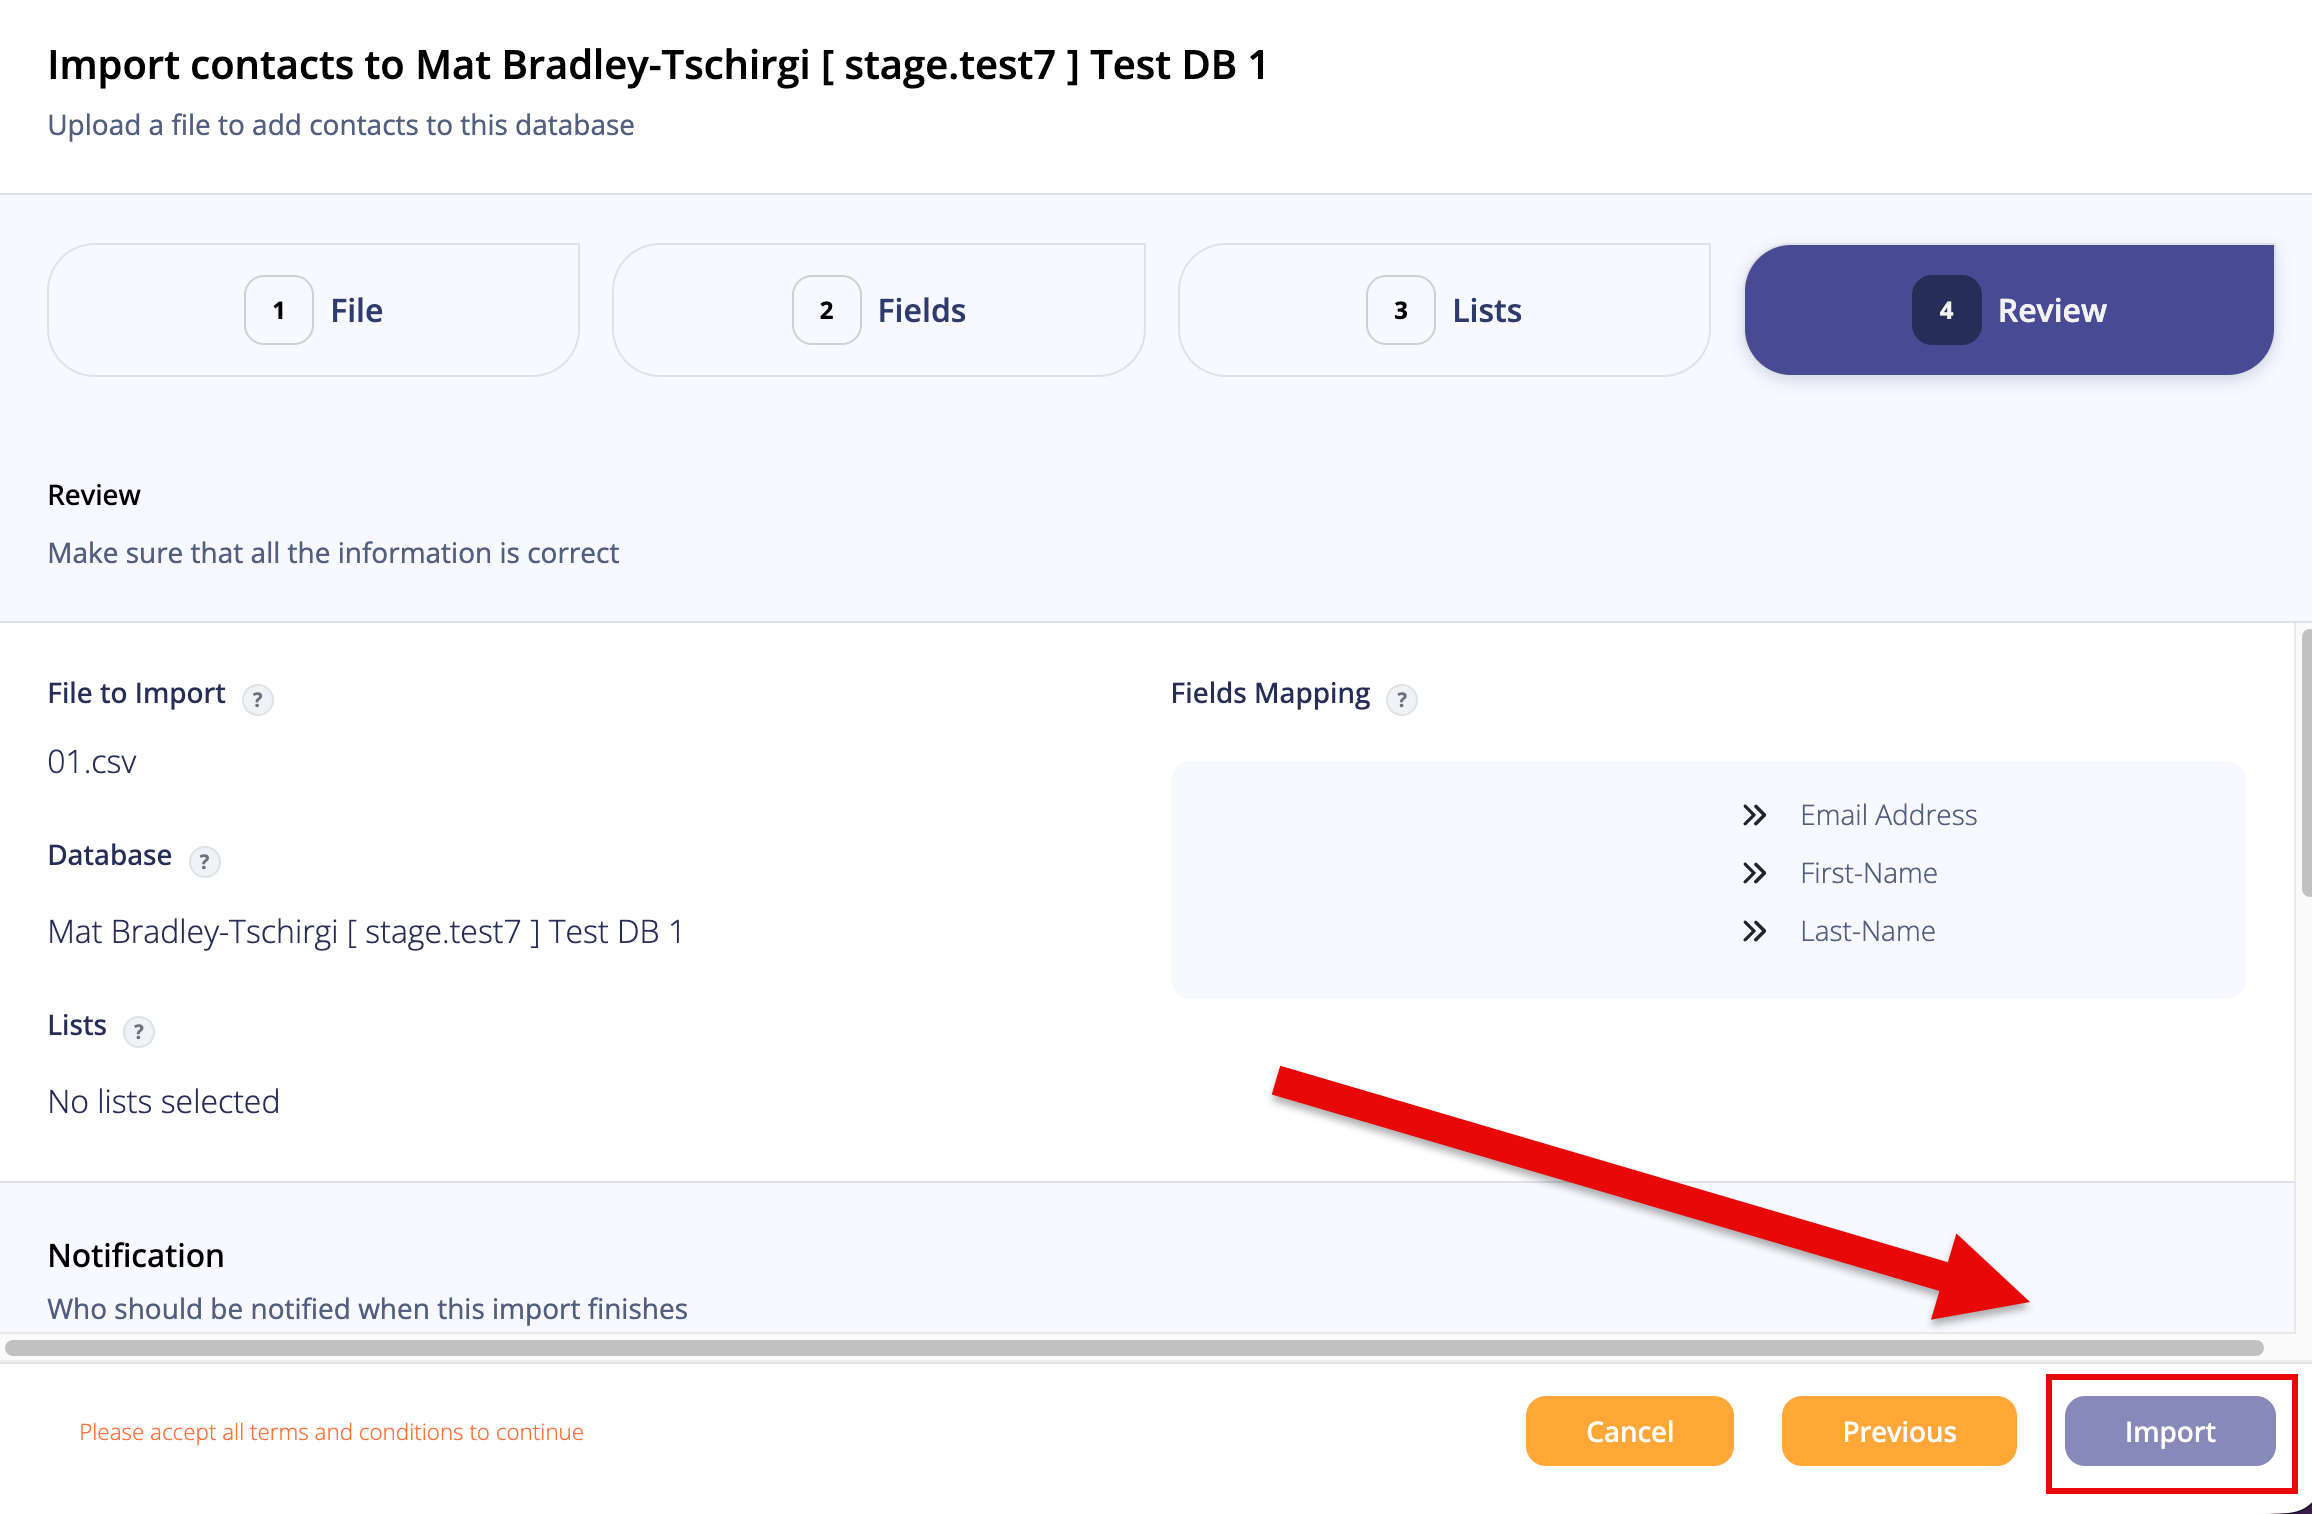
On the review page, check to make sure everything is correct before clicking "Import" (Fig 5).
Fig 5
When the Import is done, the Import Started notification will pop up in the upper-right corner (Fig 6).
Fig 6

Exporting contacts from a database
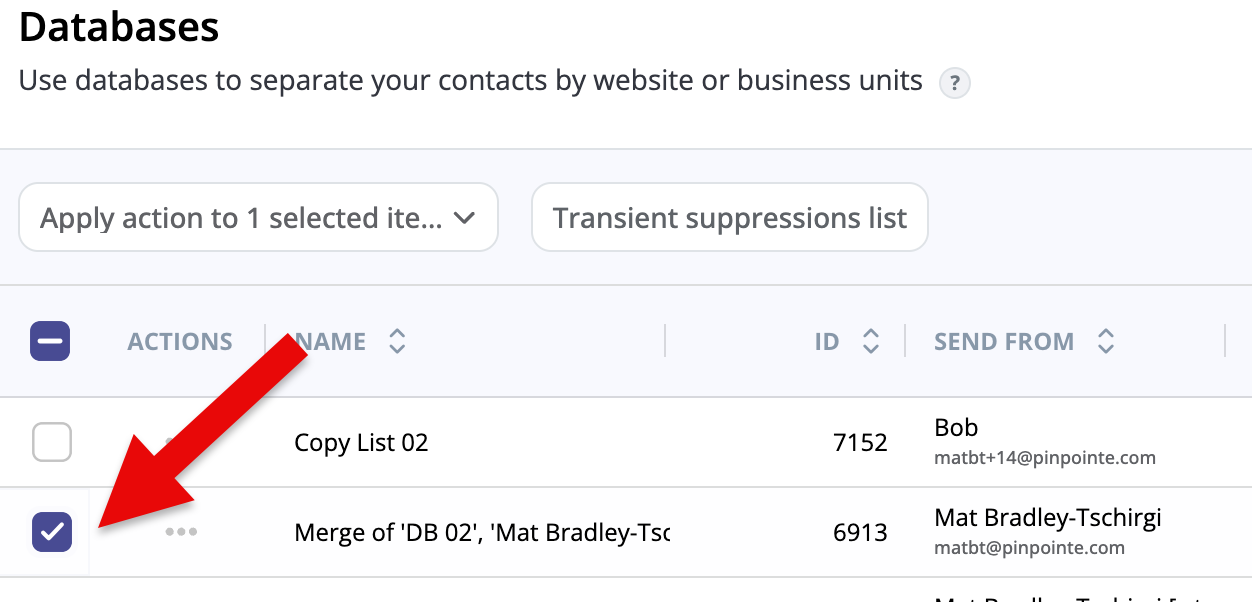
To export contacts from a database, start by clicking the checkbox next to the database you want to export (Fig 7).
Fig 7
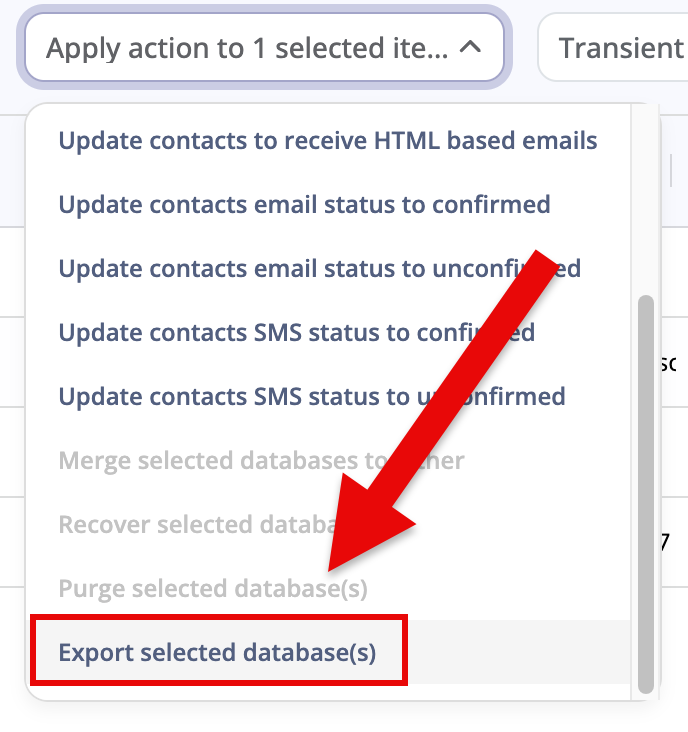
Now, click the Apply Action drop-down menu, scroll down, and select Export selected databases (Fig 8).
Fig 8
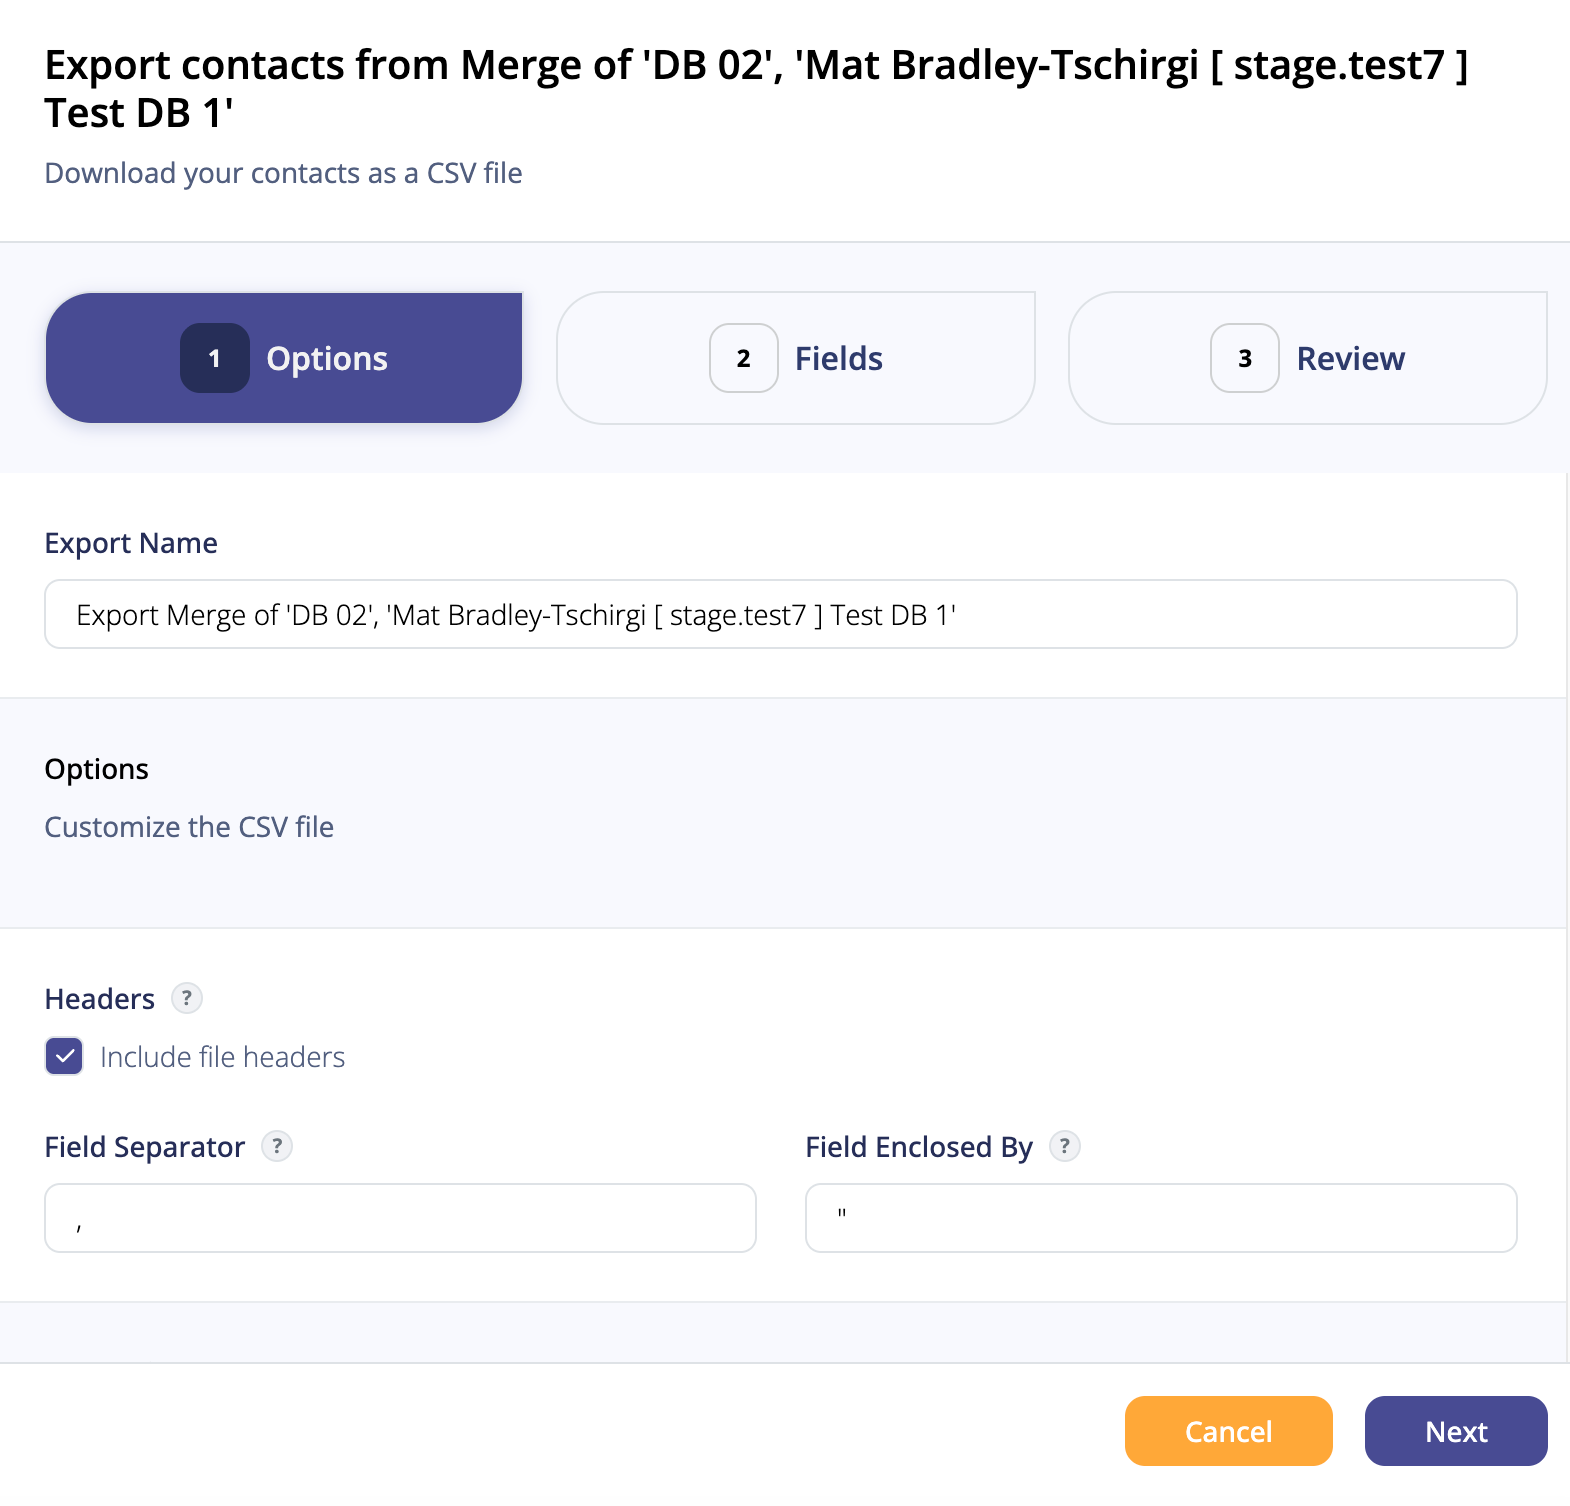
This will launch the Export Contacts modal.
Here, you'll need to fill out the following fields before clicking the "Next" button to advance to the Fields tab (Fig 9):
- Export Name
- Options
- Headers
- Field Separator
- Field Enclosed By
Fig 9
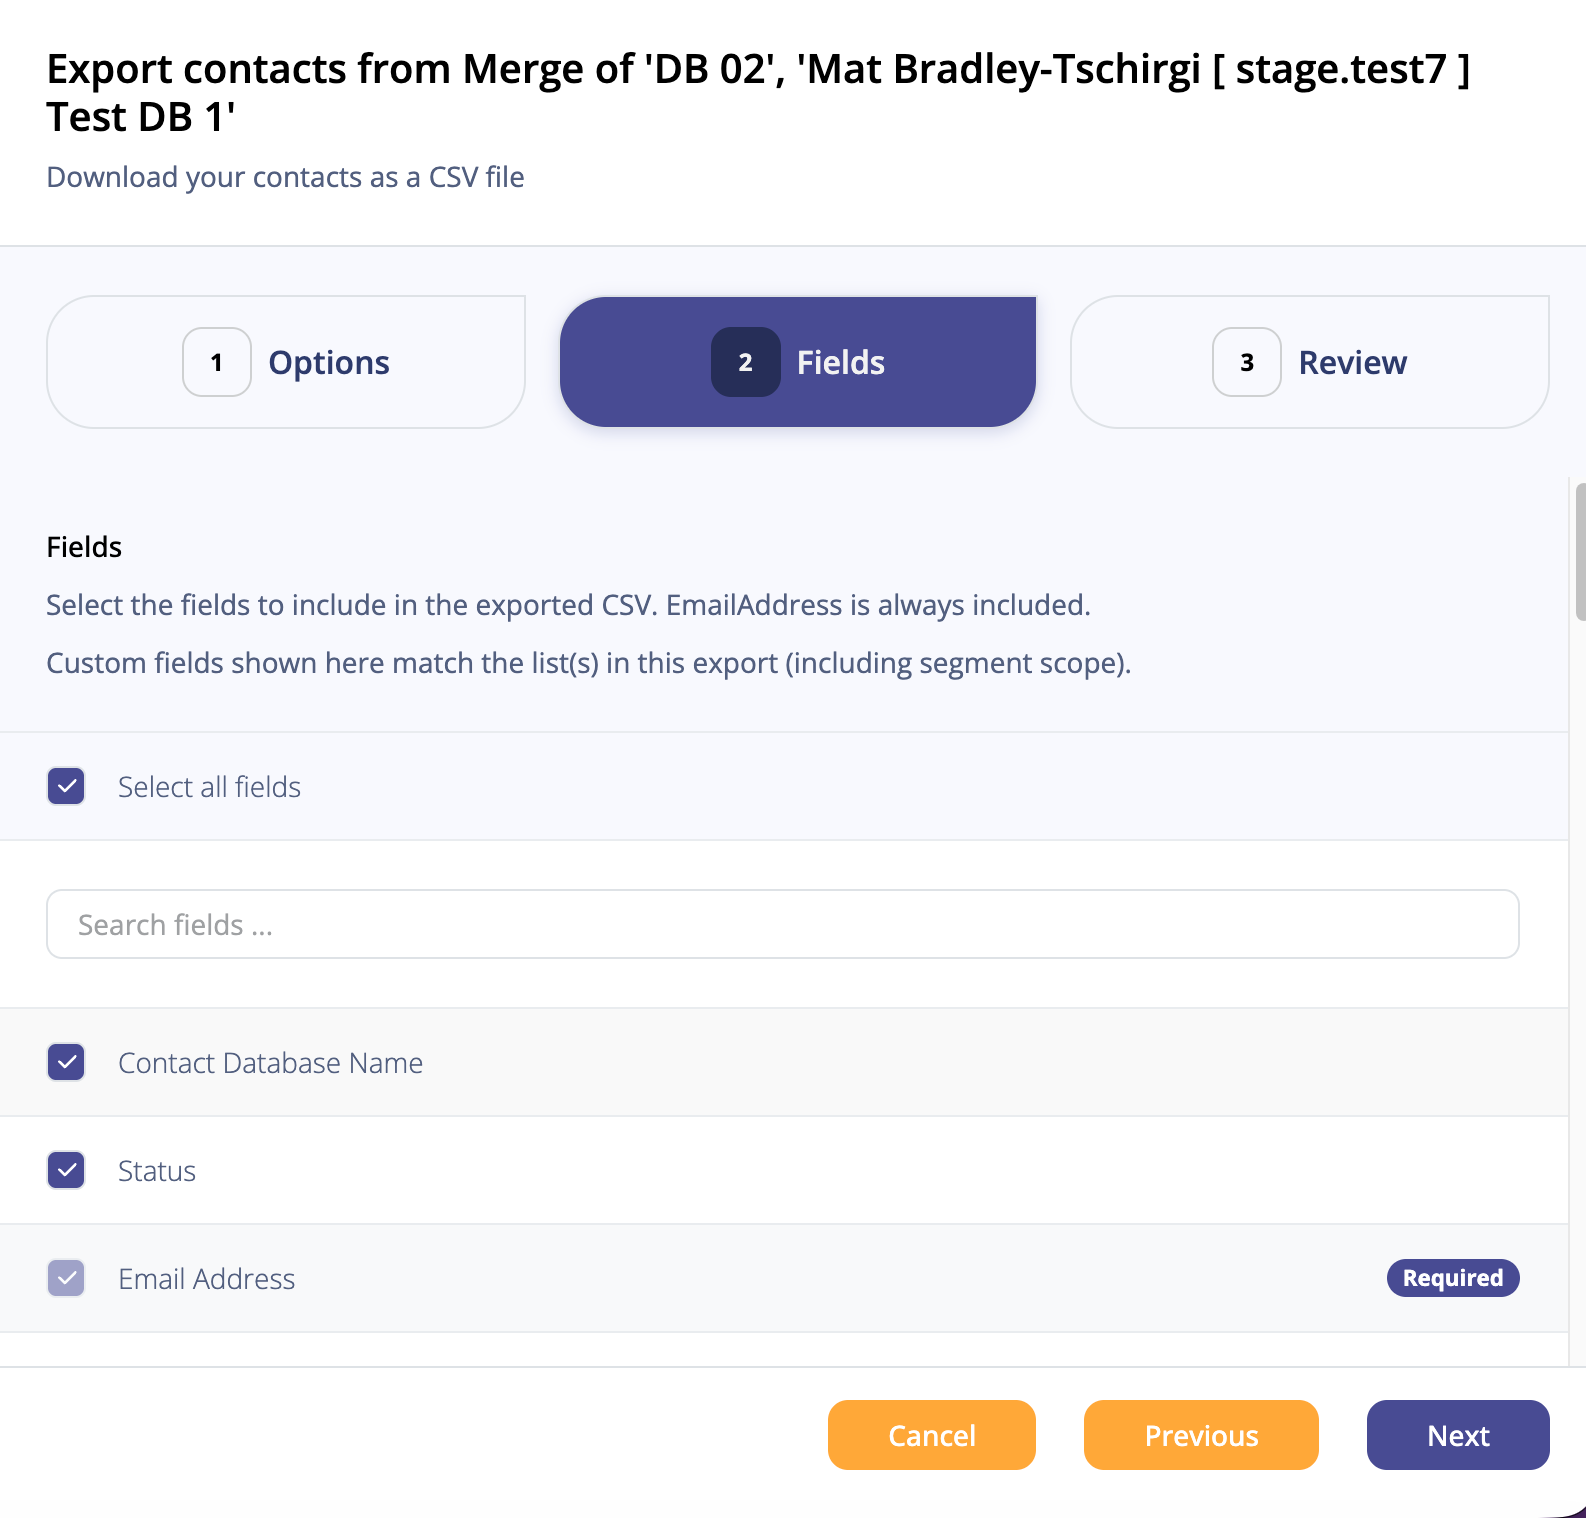
On the Fields tab, you can select the individual fields you want to carry over into the exported CSV file (Fig 10).
Only the Email Address field is required.
If you want to include all the fields, you can click the "Select all fields" checkbox.
When you're done, click the "Next" button to advance to the final Review tab.
Fig 10
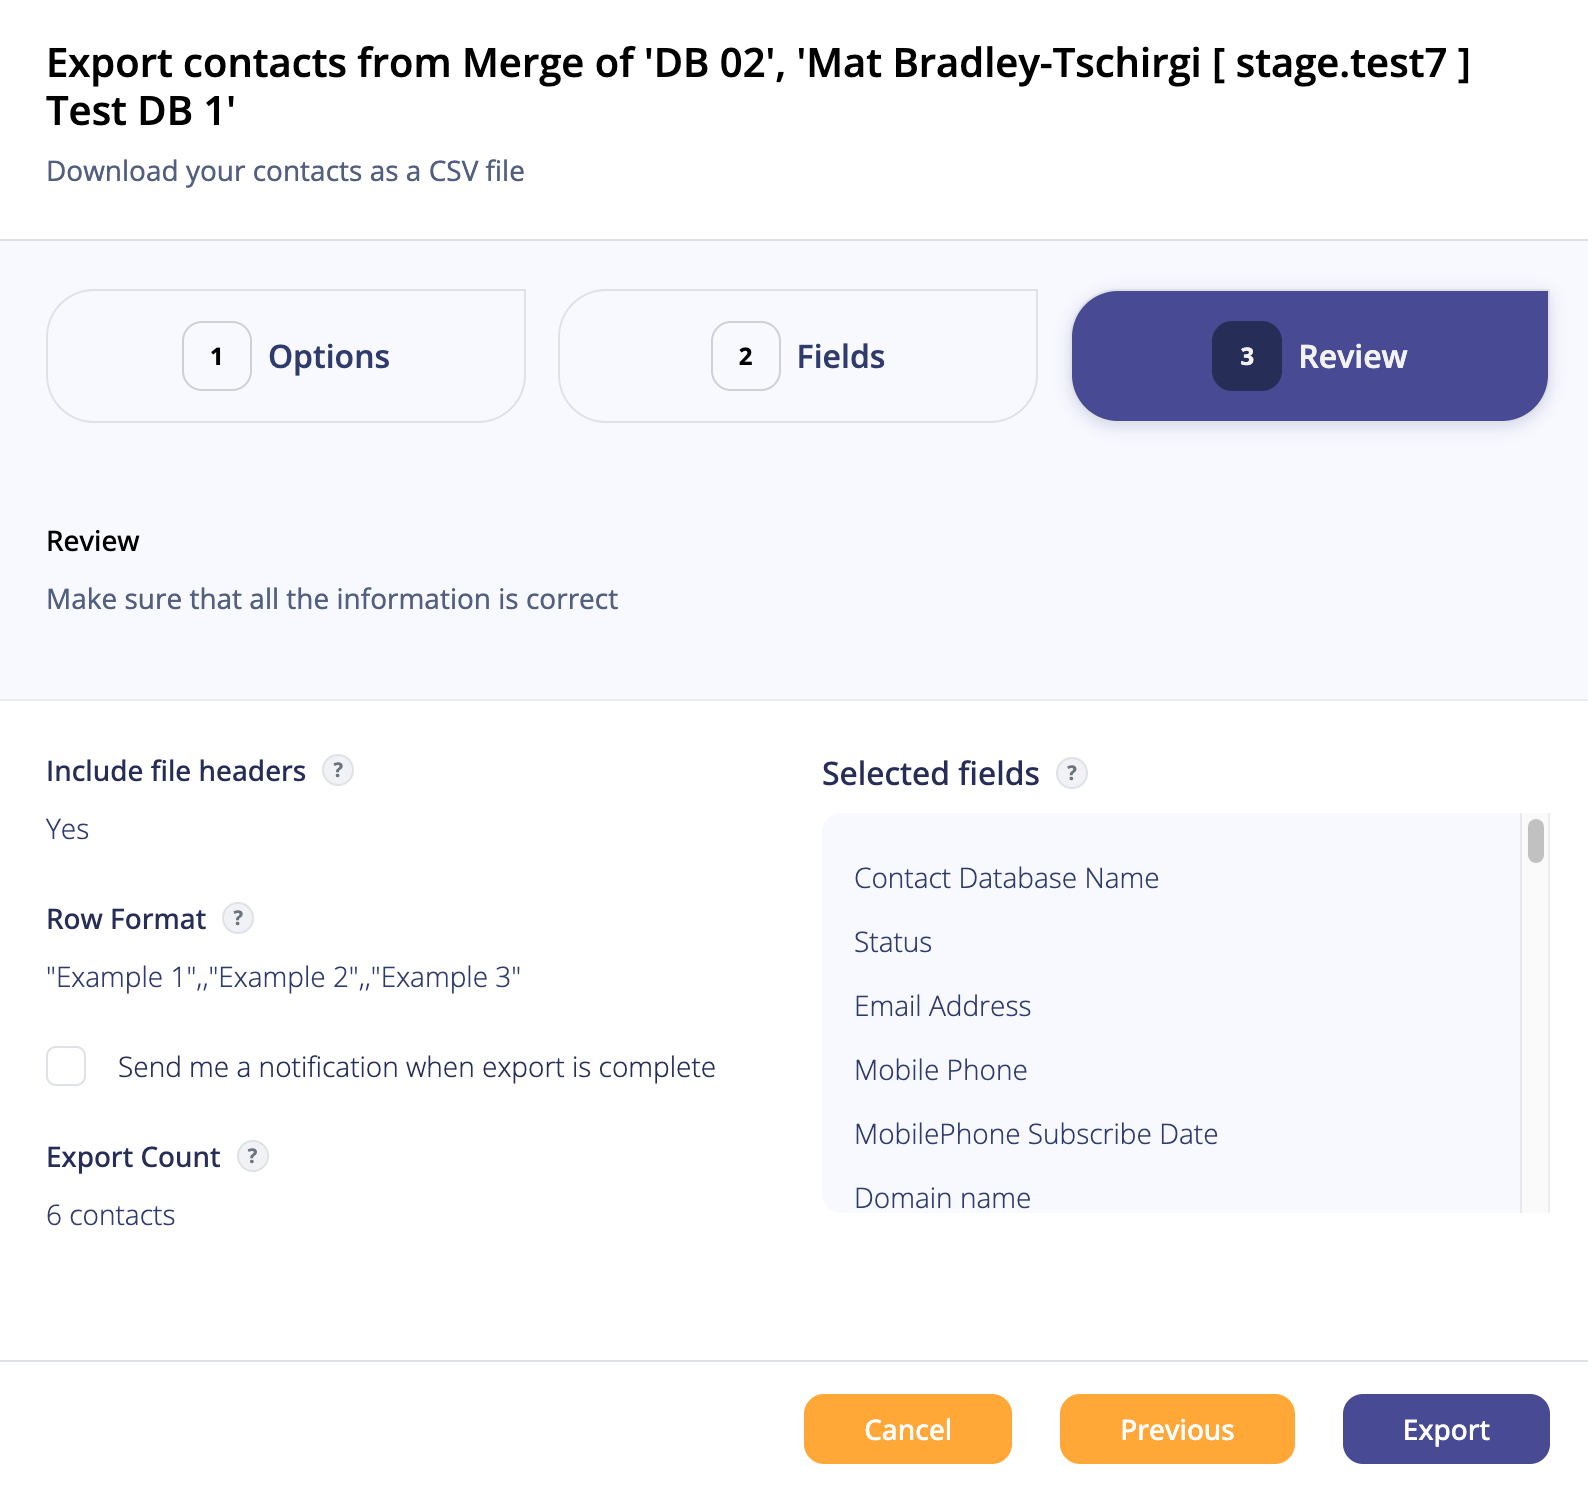
On the Review tab, you will see an overview of what your CSV will include (Fig 11).
If you like, you can choose to receive a notification when the export is complete by clicking the checkbox.
If you need to go back and make a change, click on the "Previous" button.
When you're all done, click on the "Export" button.
Fig 11
Now, you'll be whisked away to the Export Queue where you can see your Contacts Export in progress (Fig 12).
Fig 12

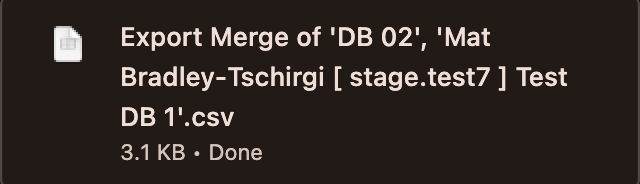
Once the Contacts Export is done, you should see be able to download your CSV (Fig 13).
Fig 13
Exporting contacts from a list
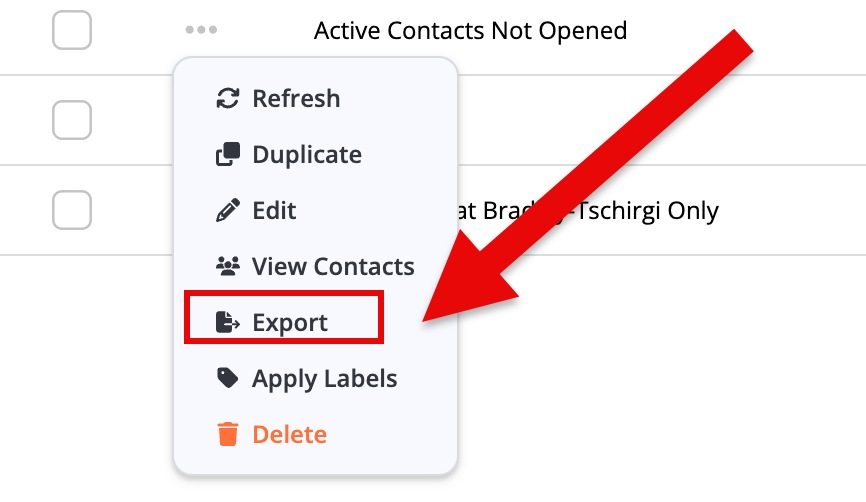
To export contacts from a segment, navigate to the Lists page and click the "..." in the Actions column to open the menu and click on Export (Fig 14).
Fig 14
This will launch the Export Contacts modal.
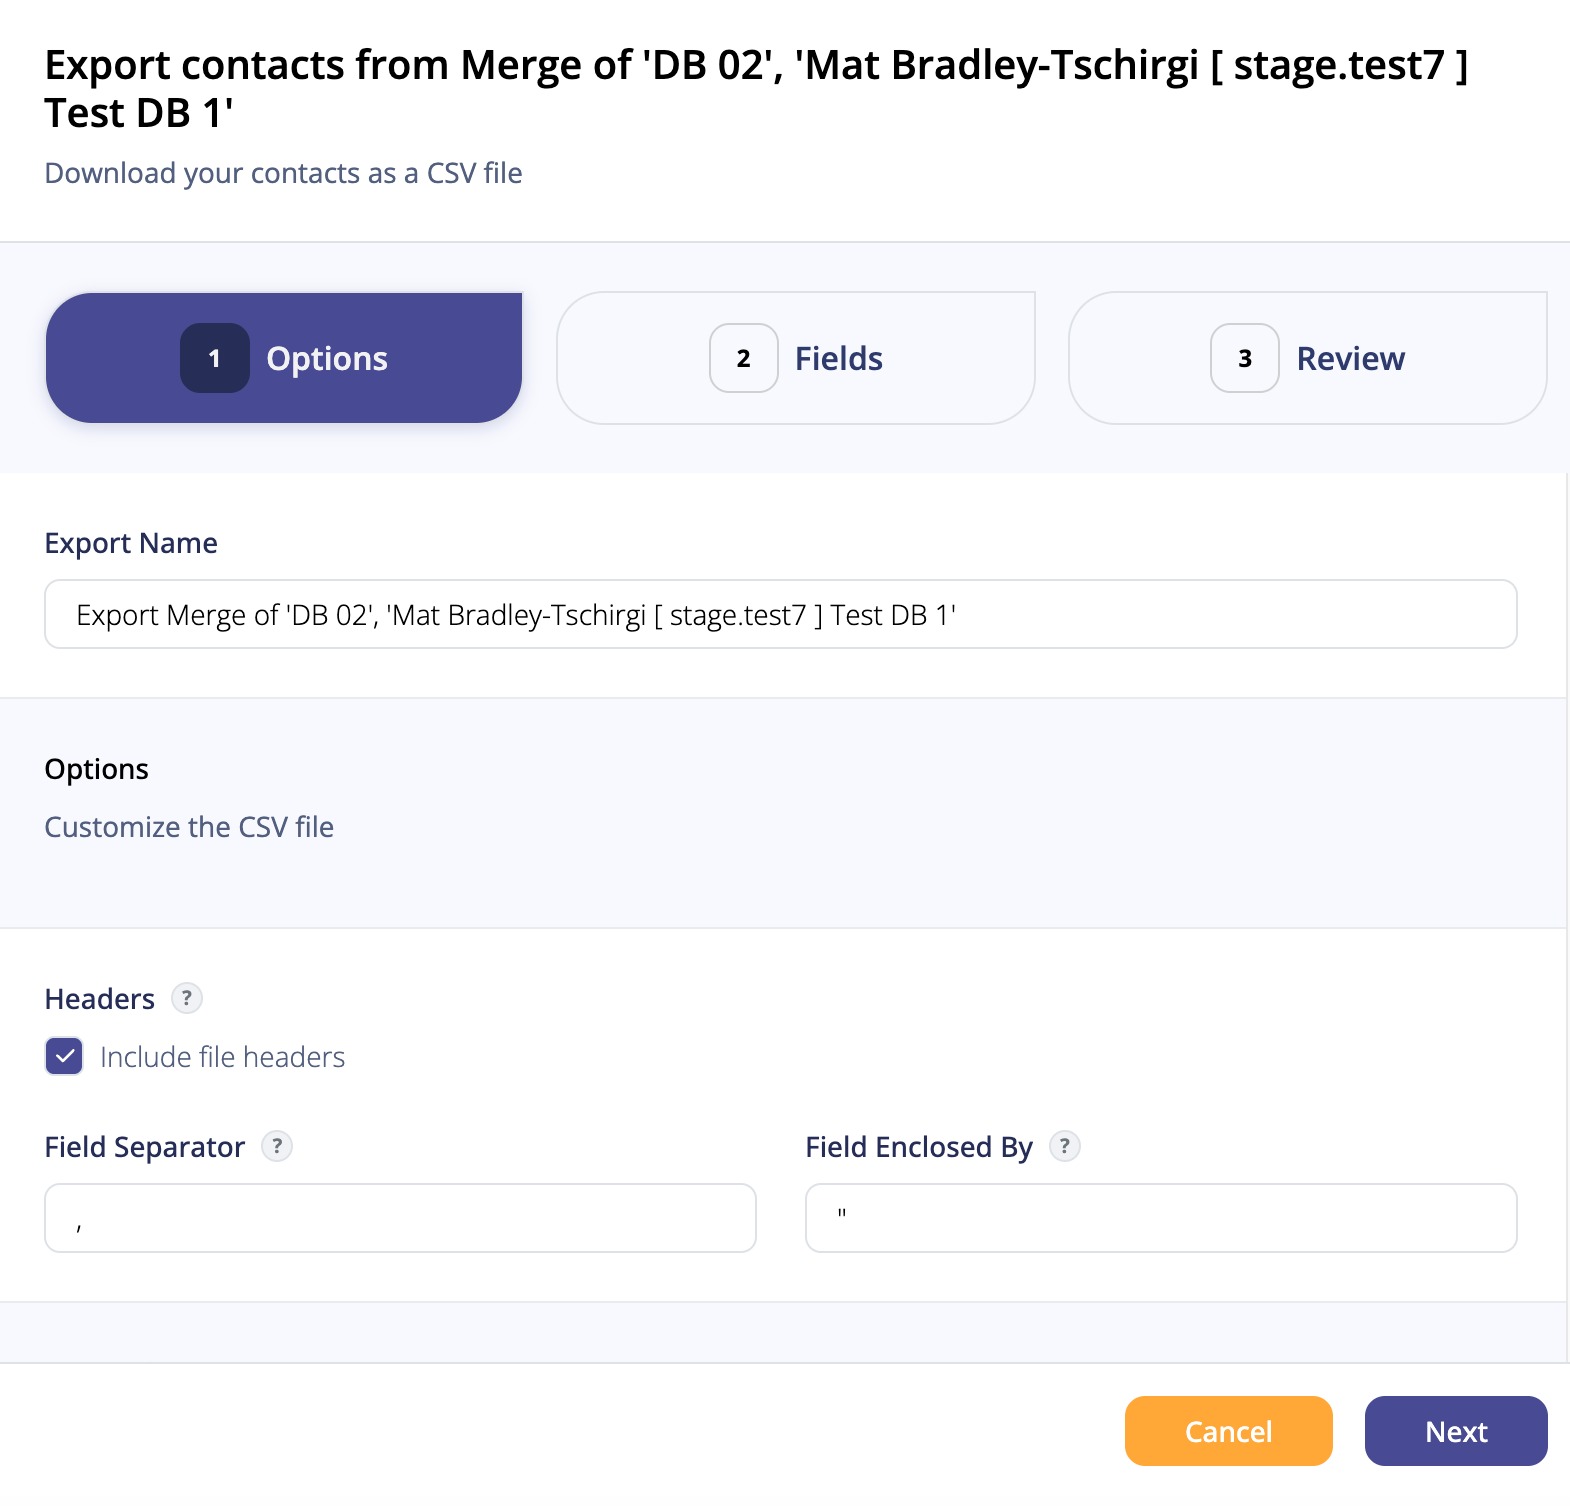
Here, you'll need to fill out the following fields before clicking the "Next" button to advance to the Fields tab (Fig 15):
- Export Name
- Options
- Headers
- Field Separator
- Field Enclosed By
Fig 15
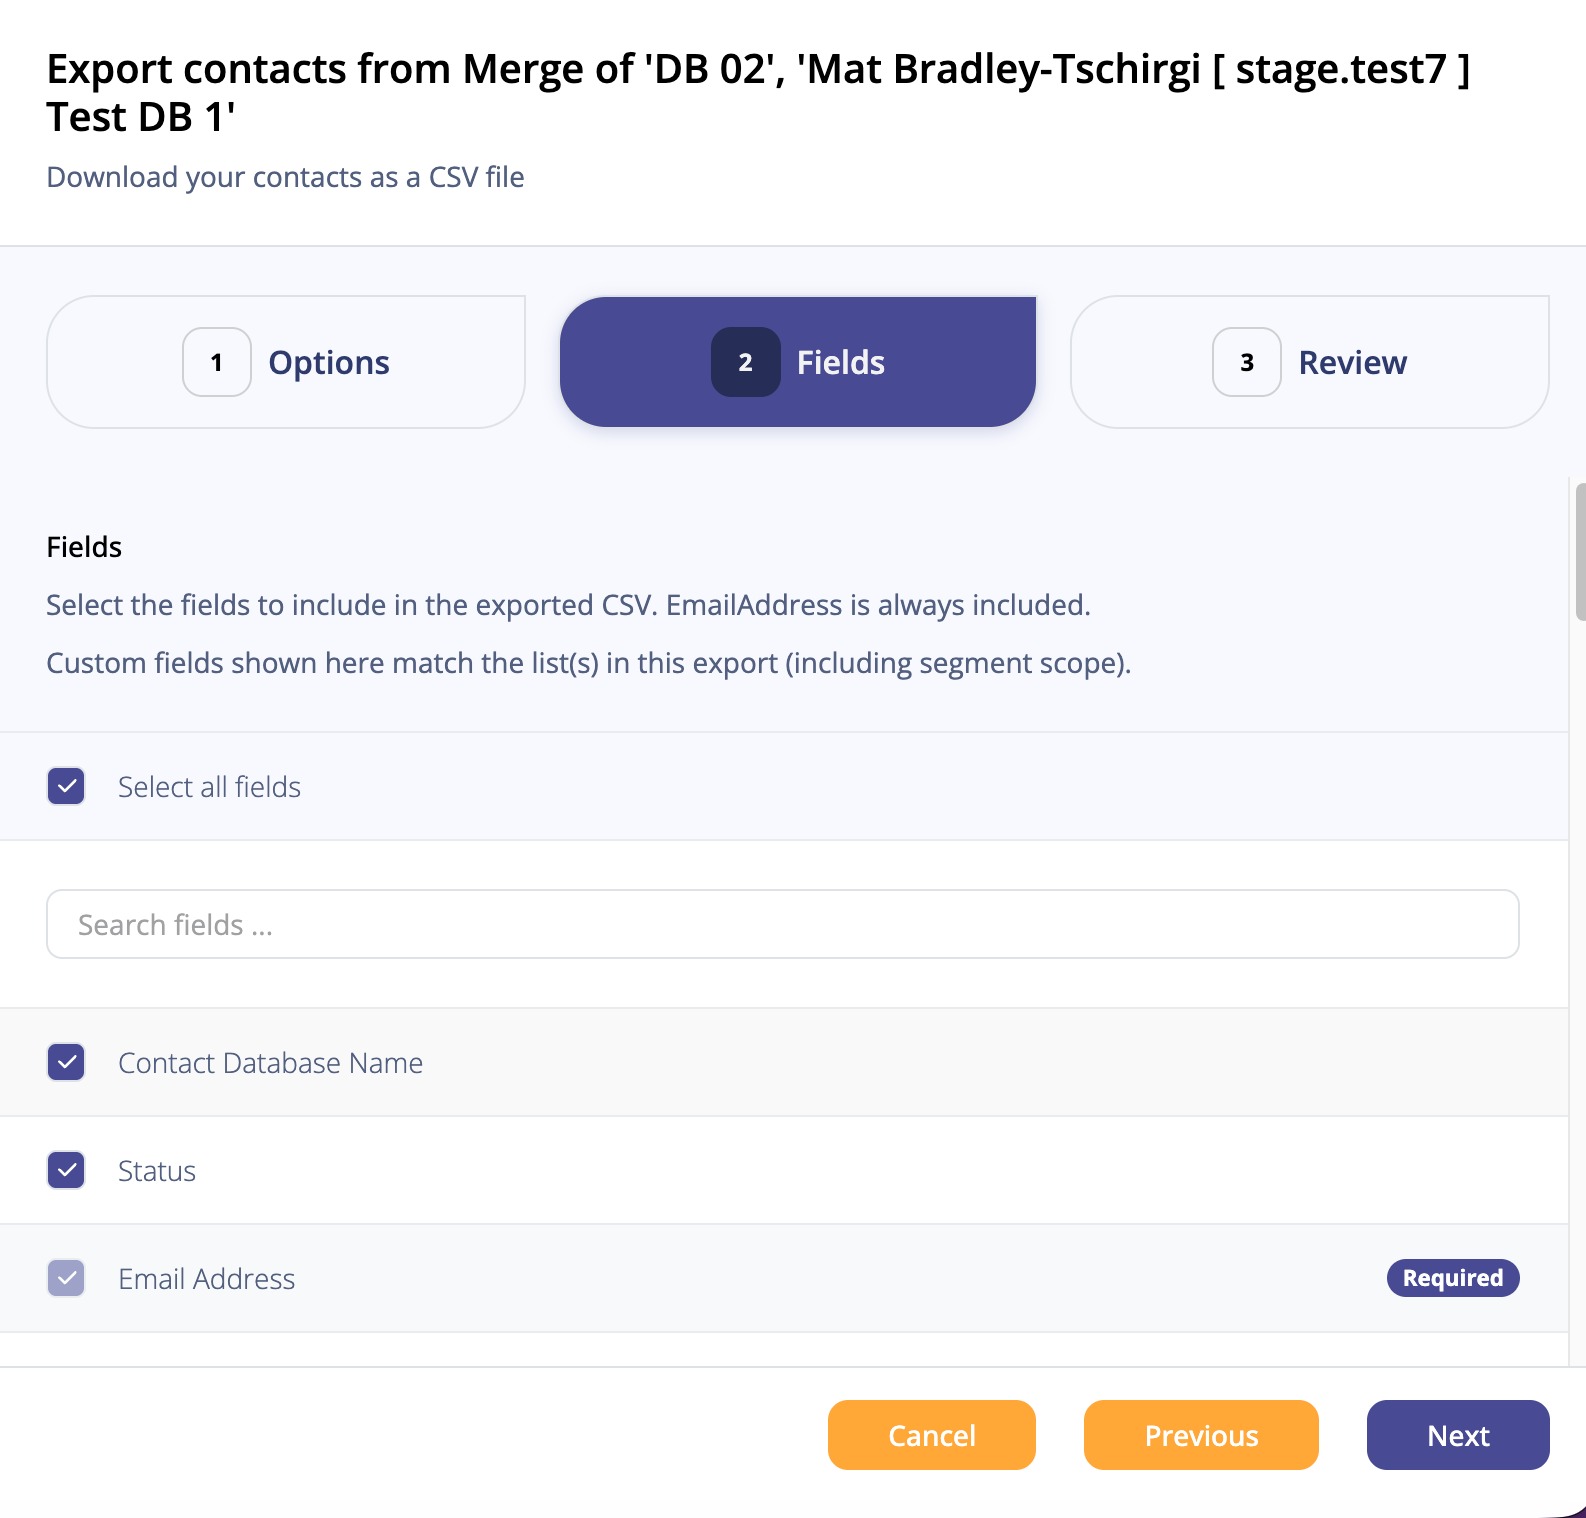
On the Fields tab, you can select the individual fields you want to carry over into the exported CSV file (Fig 16).
Only the Email Address field is required.
If you want to include all the fields, you can click the "Select all fields" checkbox.
When you're done, click the "Next" button to advance to the final Review tab.
Fig 16
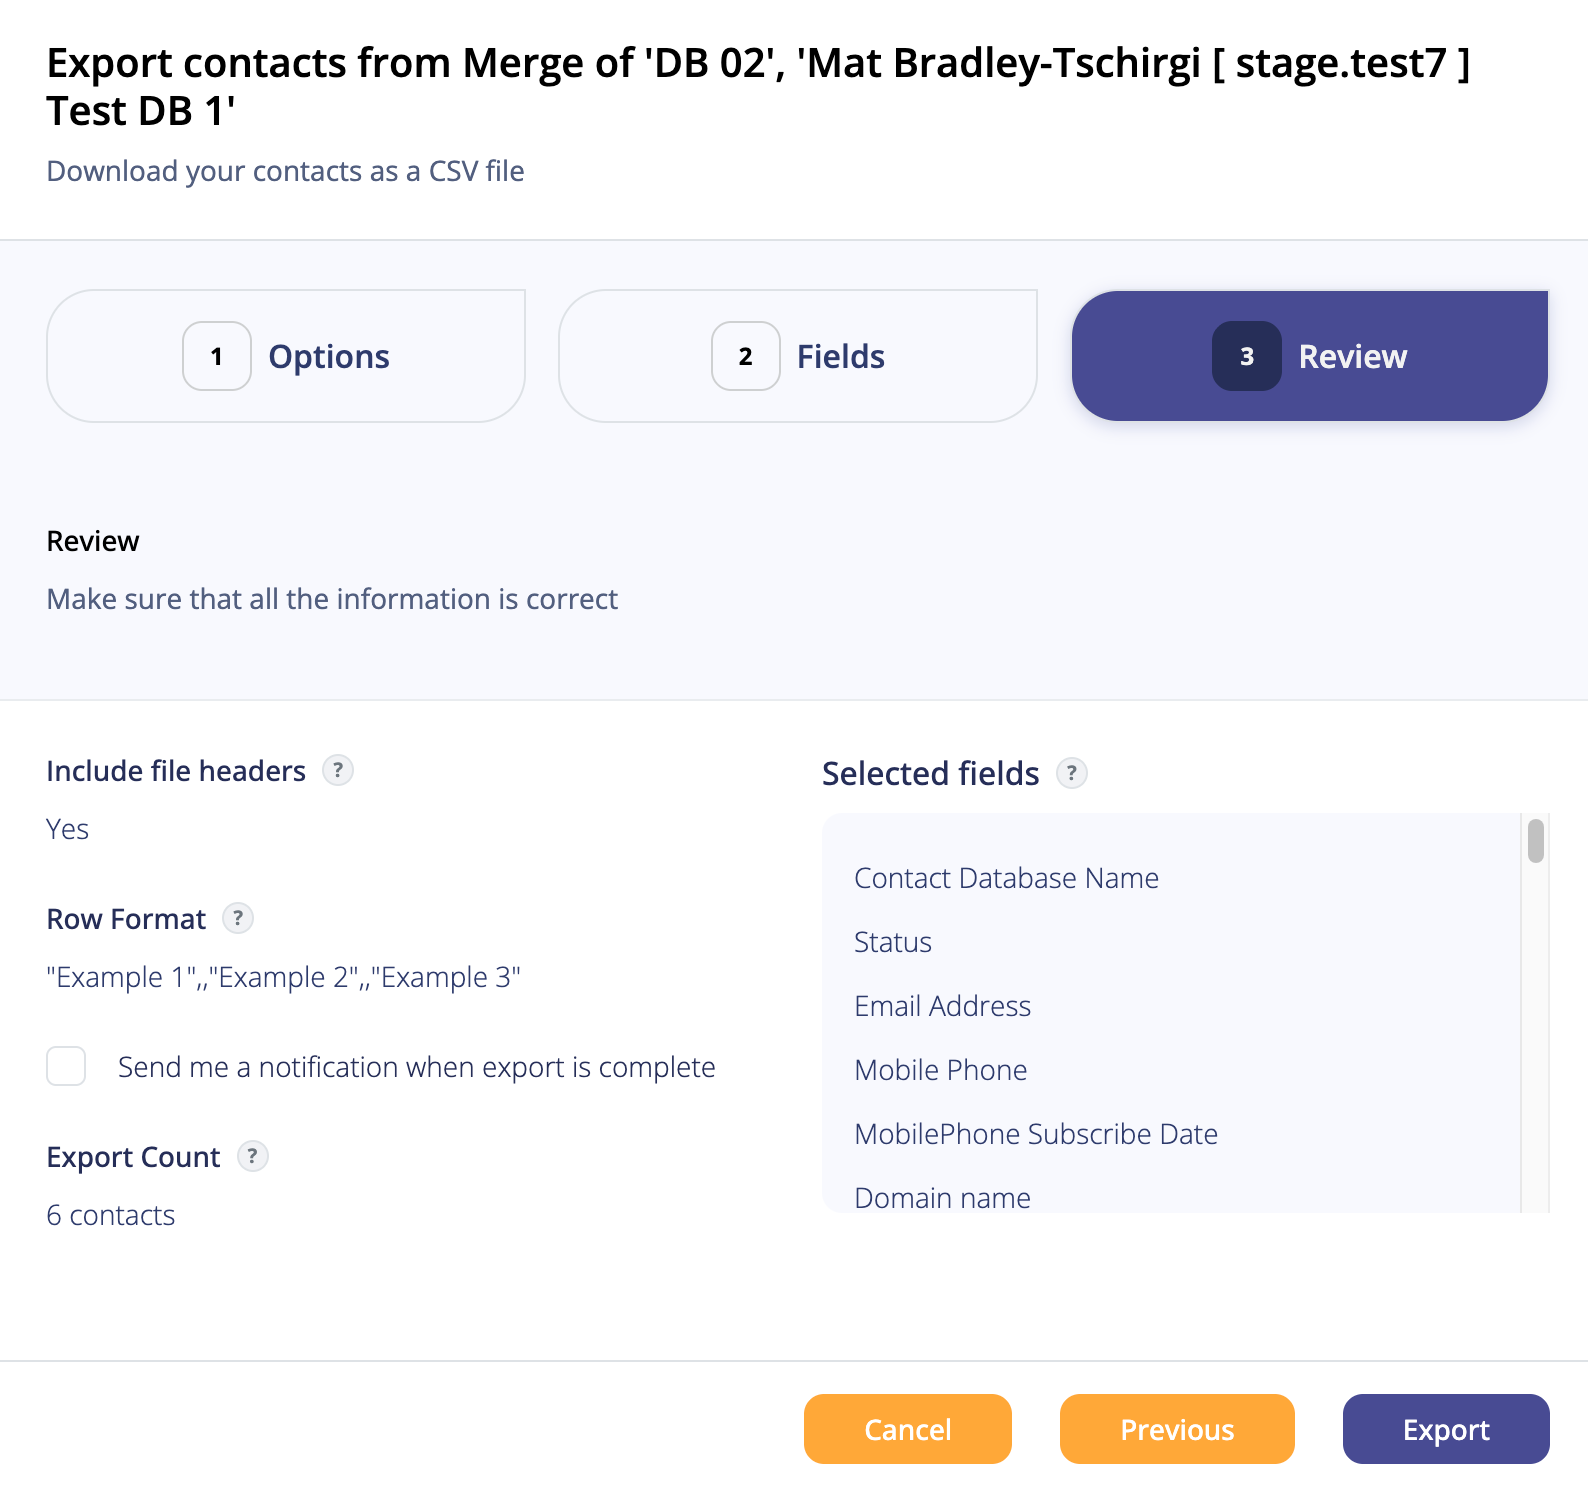
On the Review tab, you will see an overview of what your CSV will include (Fig 17).
If you like, you can choose to receive a notification when the export is complete by clicking the checkbox.
If you need to go back and make a change, click on the "Previous" button.
When you're all done, click on the "Export" button.
Fig 17
Now, you'll be whisked away to the Export Queue where you can see your Contacts Export in progress (Fig 18).
Fig 18

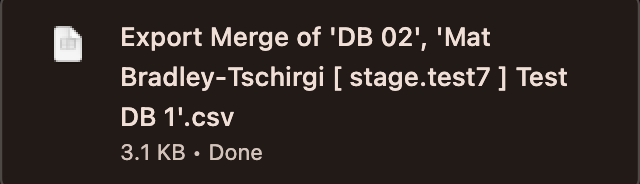
Once the Contacts Export is done, you should see be able to download your CSV (Fig 19).
Fig 19
Exporting contacts from a segment
To export contacts from a segment, navigate to the Segments page and click the "..." in the Actions column to open the menu and click on Export (Fig 20).
Fig 20
This will launch the Export Contacts modal.
Here, you'll need to fill out the following fields before clicking the "Next" button to advance to the Fields tab (Fig 21):
- Export Name
- Options
- Headers
- Field Separator
- Field Enclosed By
Fig 21
On the Fields tab, you can select the individual fields you want to carry over into the exported CSV file (Fig 22).
Only the Email Address field is required.
If you want to include all the fields, you can click the "Select all fields" checkbox.
When you're done, click the "Next" button to advance to the final Review tab.
Fig 22
On the Review tab, you will see an overview of what your CSV will include (Fig 23).
If you like, you can choose to receive a notification when the export is complete by clicking the checkbox.
If you need to go back and make a change, click on the "Previous" button.
When you're all done, click on the "Export" button.
Fig 23
Now, you'll be whisked away to the Export Queue where you can see your Contacts Export in progress (Fig 24).
Fig 24
Once the Contacts Export is done, you should see be able to download your CSV (Fig 25).
Fig 25