Welcome to Pinpointe's New UI! The New UI will make parts of Pinpointe, including Contacts Management, Forms, and Resource Management, have a more modern look and feel.
We're going to take a look at how to opt in and out of the New UI and how to navigate its brand new look.
TABLE OF CONTENTS
Pinpointe's New UI
Opting Into Pinpointe's New UI
After logging in and navigating away from the main dashboard, you should be able to see a banner at the top that states "We're giving Pinpointe an exciting new look! Would you like to switch over to the new UI to give it a spin?" (Fig 1).
Fig 1

Clicking the "Try New UI" button on the far right of the banner switches you over to the New UI (Fig 2).
Fig 2

If the changes don't appear right away, you might need to refresh your browser.
Opting Out of Pinpointe's New UI
If you don't want to use Pinpointe's New UI, you can choose not to click the "Try New UI" button.
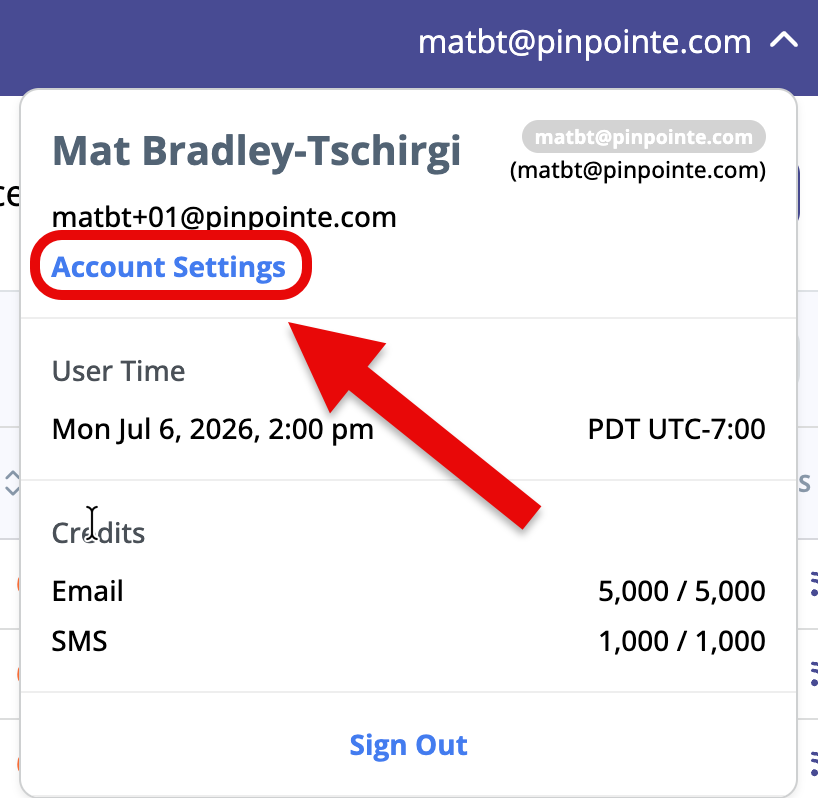
If you have switched over to Pinpointe's New UI and want to switch back to the Legacy UI, click on your user name in the upper-right corner and click on Account Settings (Fig 3).
Fig 3
Now click the Revert to Legacy UI button (Fig 4) to switch back to the Legacy UI.
Fig 4
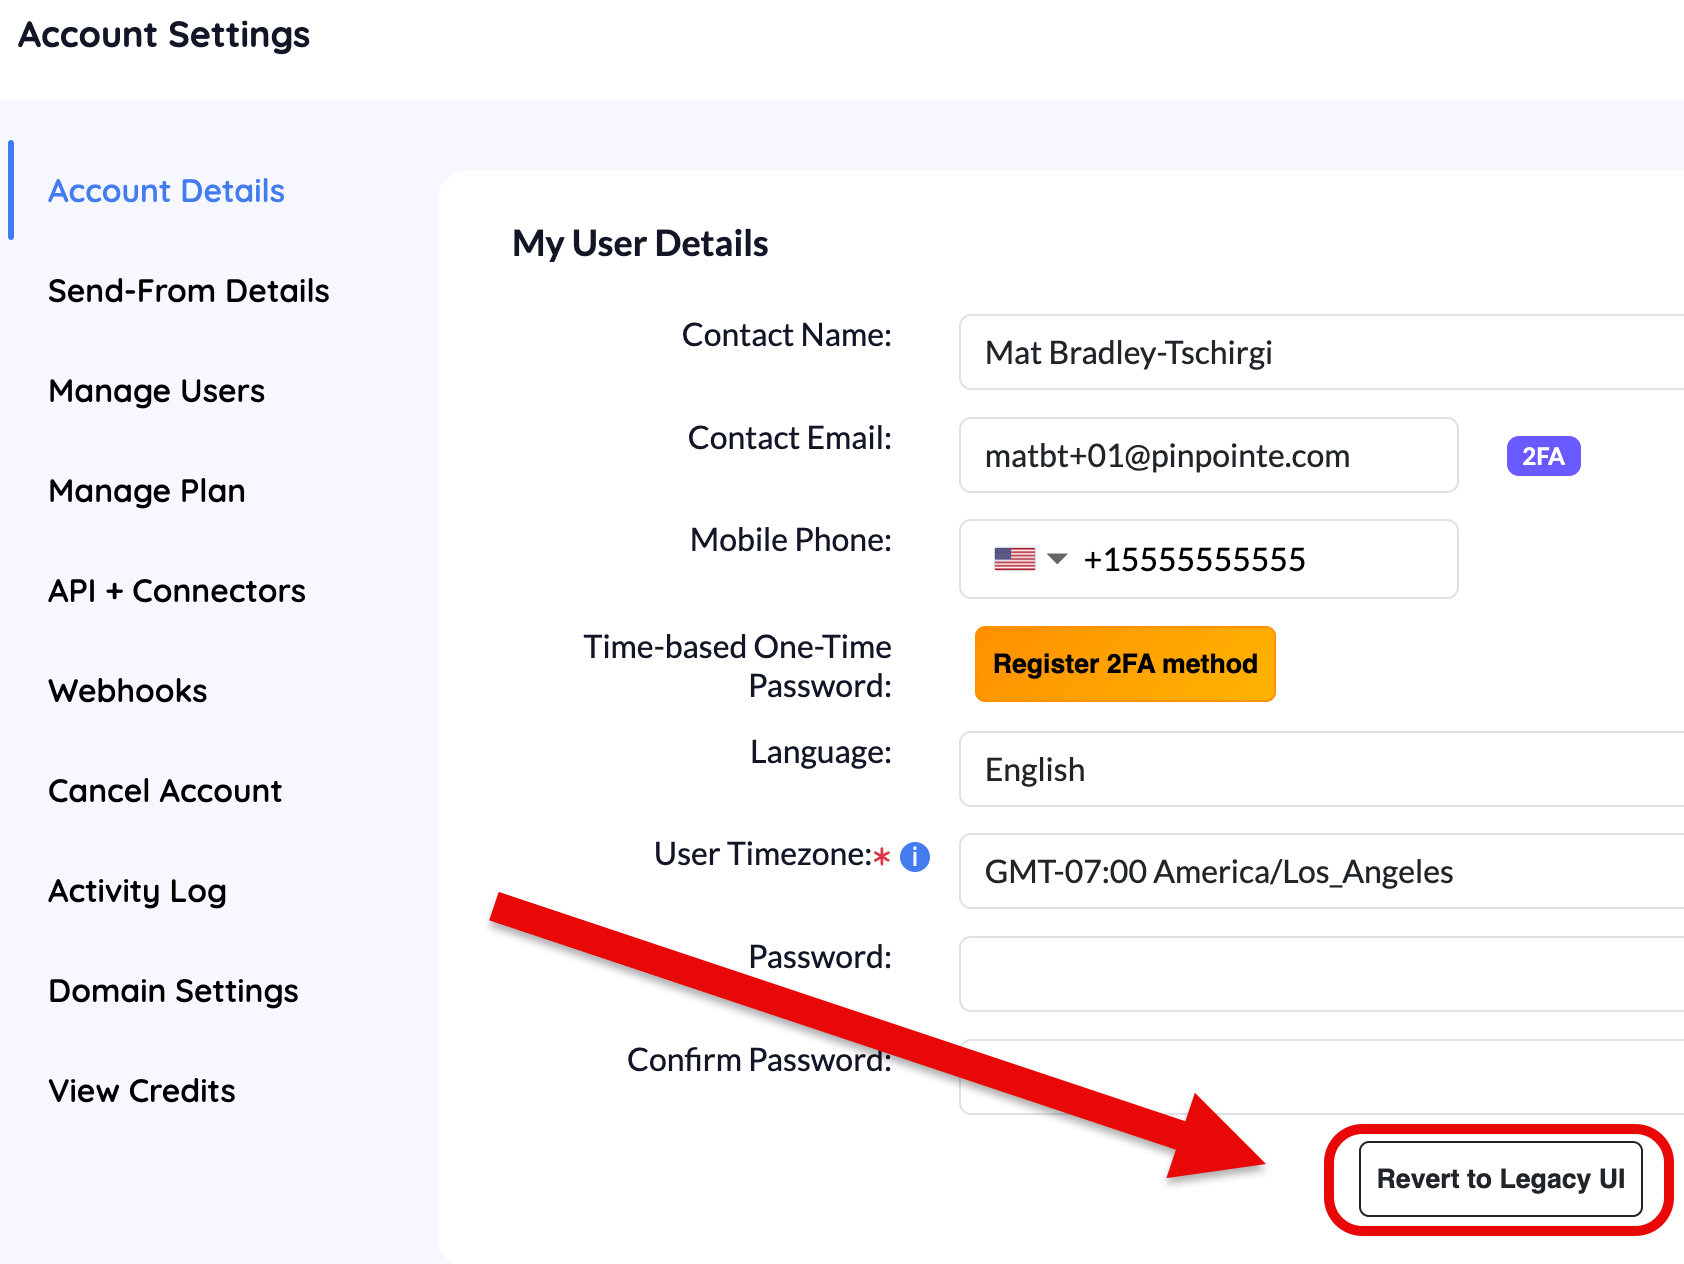
Please note that reverting to the Legacy UI will make the Try New UI banner reappear.
Now we're going to look at some of the actions you can take in Databases.
Databases
There are two ways to get to the Databases New UI.
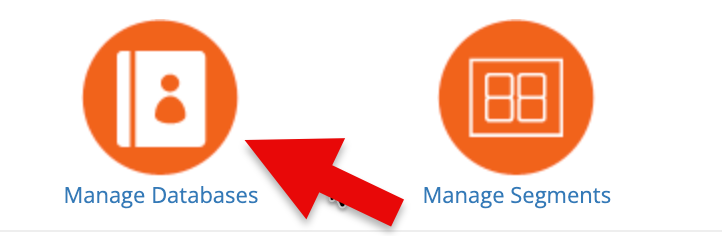
From the main dashboard, you can click the Manage Databases icon on the far left (Fig 5).
Fig 5
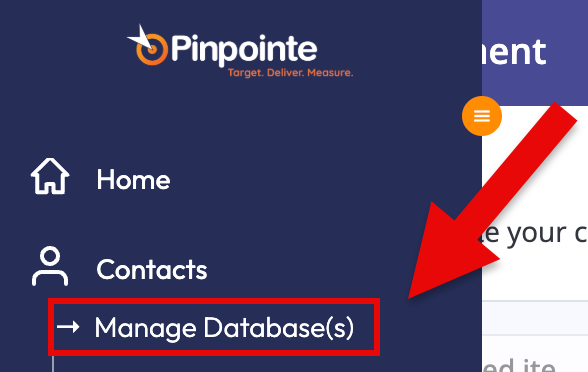
You can also click Contact on the Navigation menu then select, then click Manage Databases (Fig 6).
Fig 6
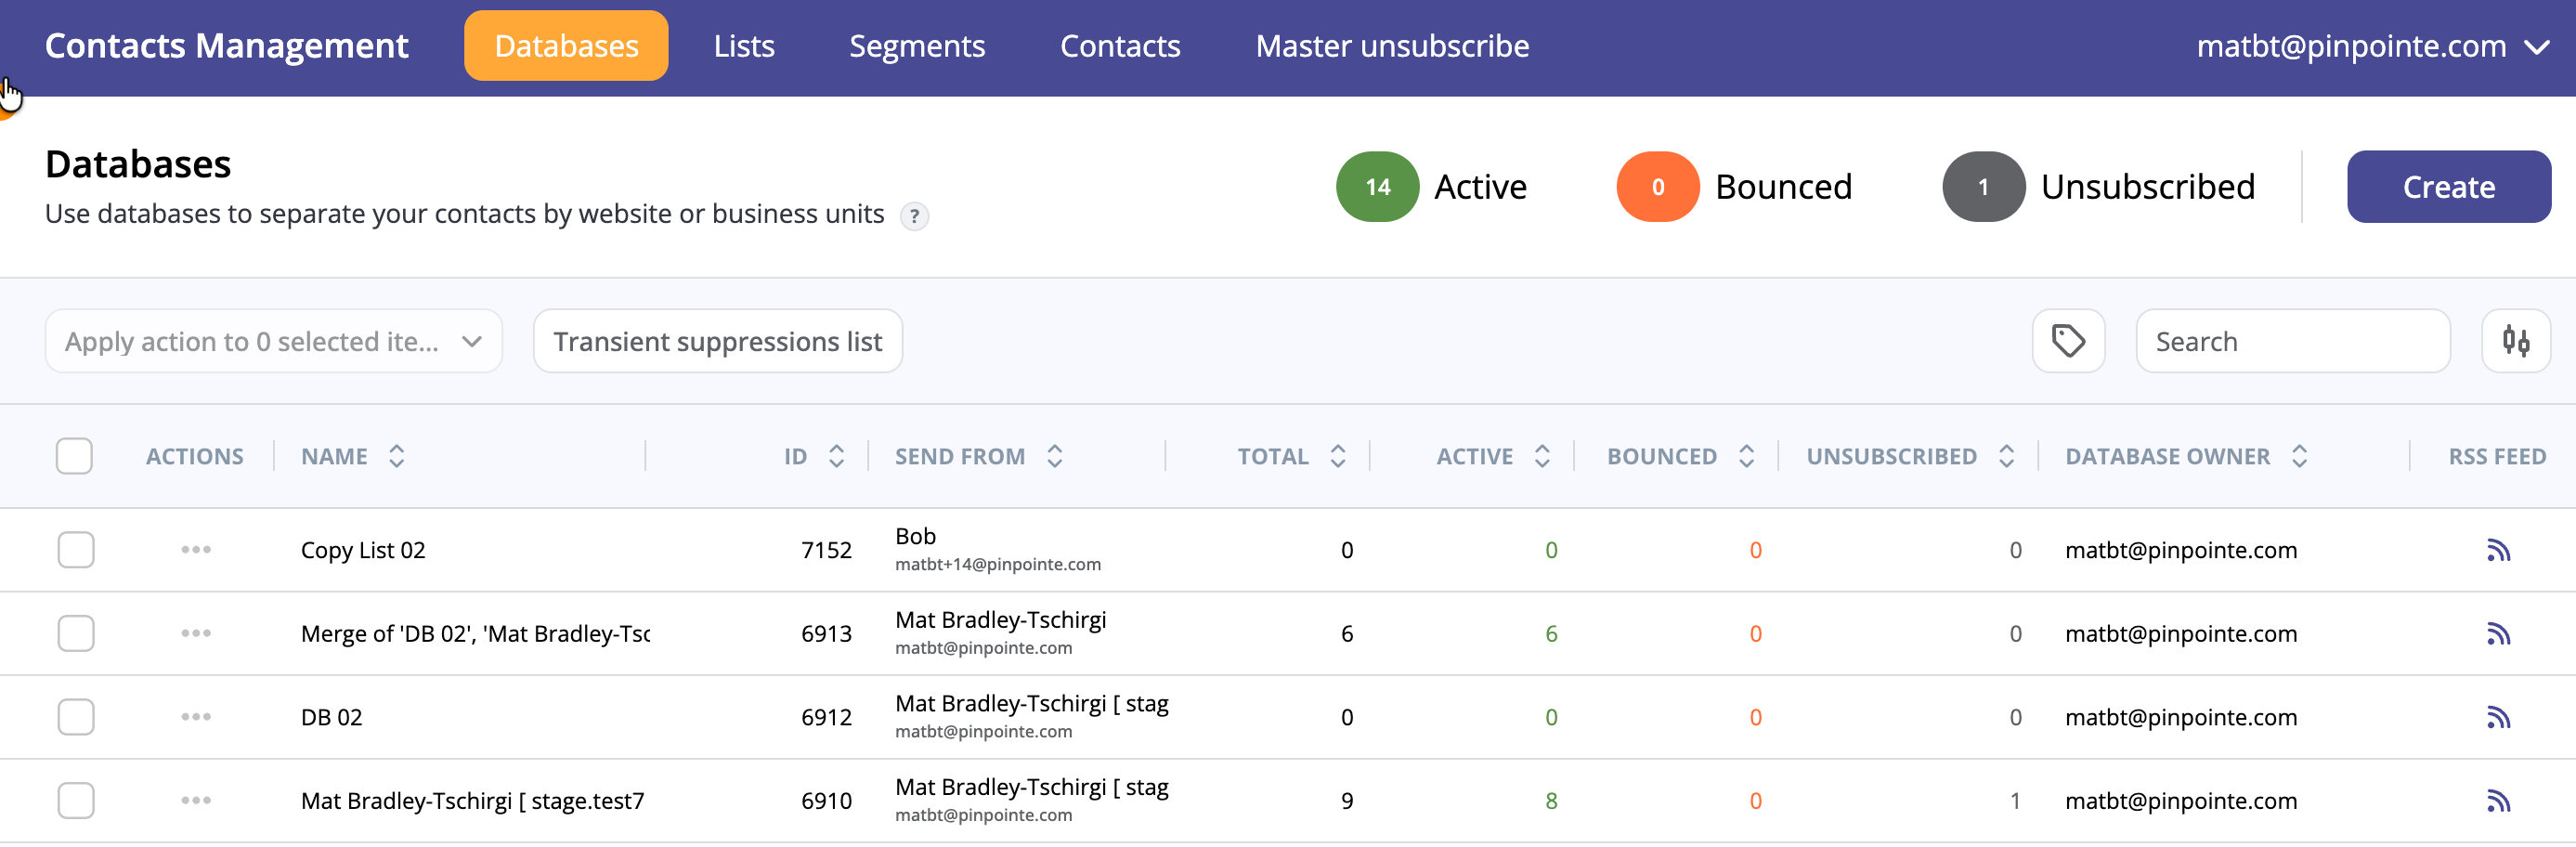
This will display the New UI for the Databases screen (Fig 7).
Fig 7
Create New Database
On the Databases page, click the "Create" button to Create a New Database (Fig 8).
Fig 8

The following fields are required to create a database:
- Basic
- Database name - The name of your database
- Database description - The description of your database
- Sender details
- Send-from name - The name that will appear in the From field of your emails
- Send-from email - Emails are sent from this address when someone subscribes/unsubscribes from your contact database
- Reply-to email - The email address that will receive replies from your contacts
- Event notifications email (only if Send event notifications is checked) - The email address that will receive event notifications
- Company details
- Name - The name of your company
- Phone number - The contact phone number for your company
- Address - The address of your company
When you're done creating your Database, click the Save button to save your changes.
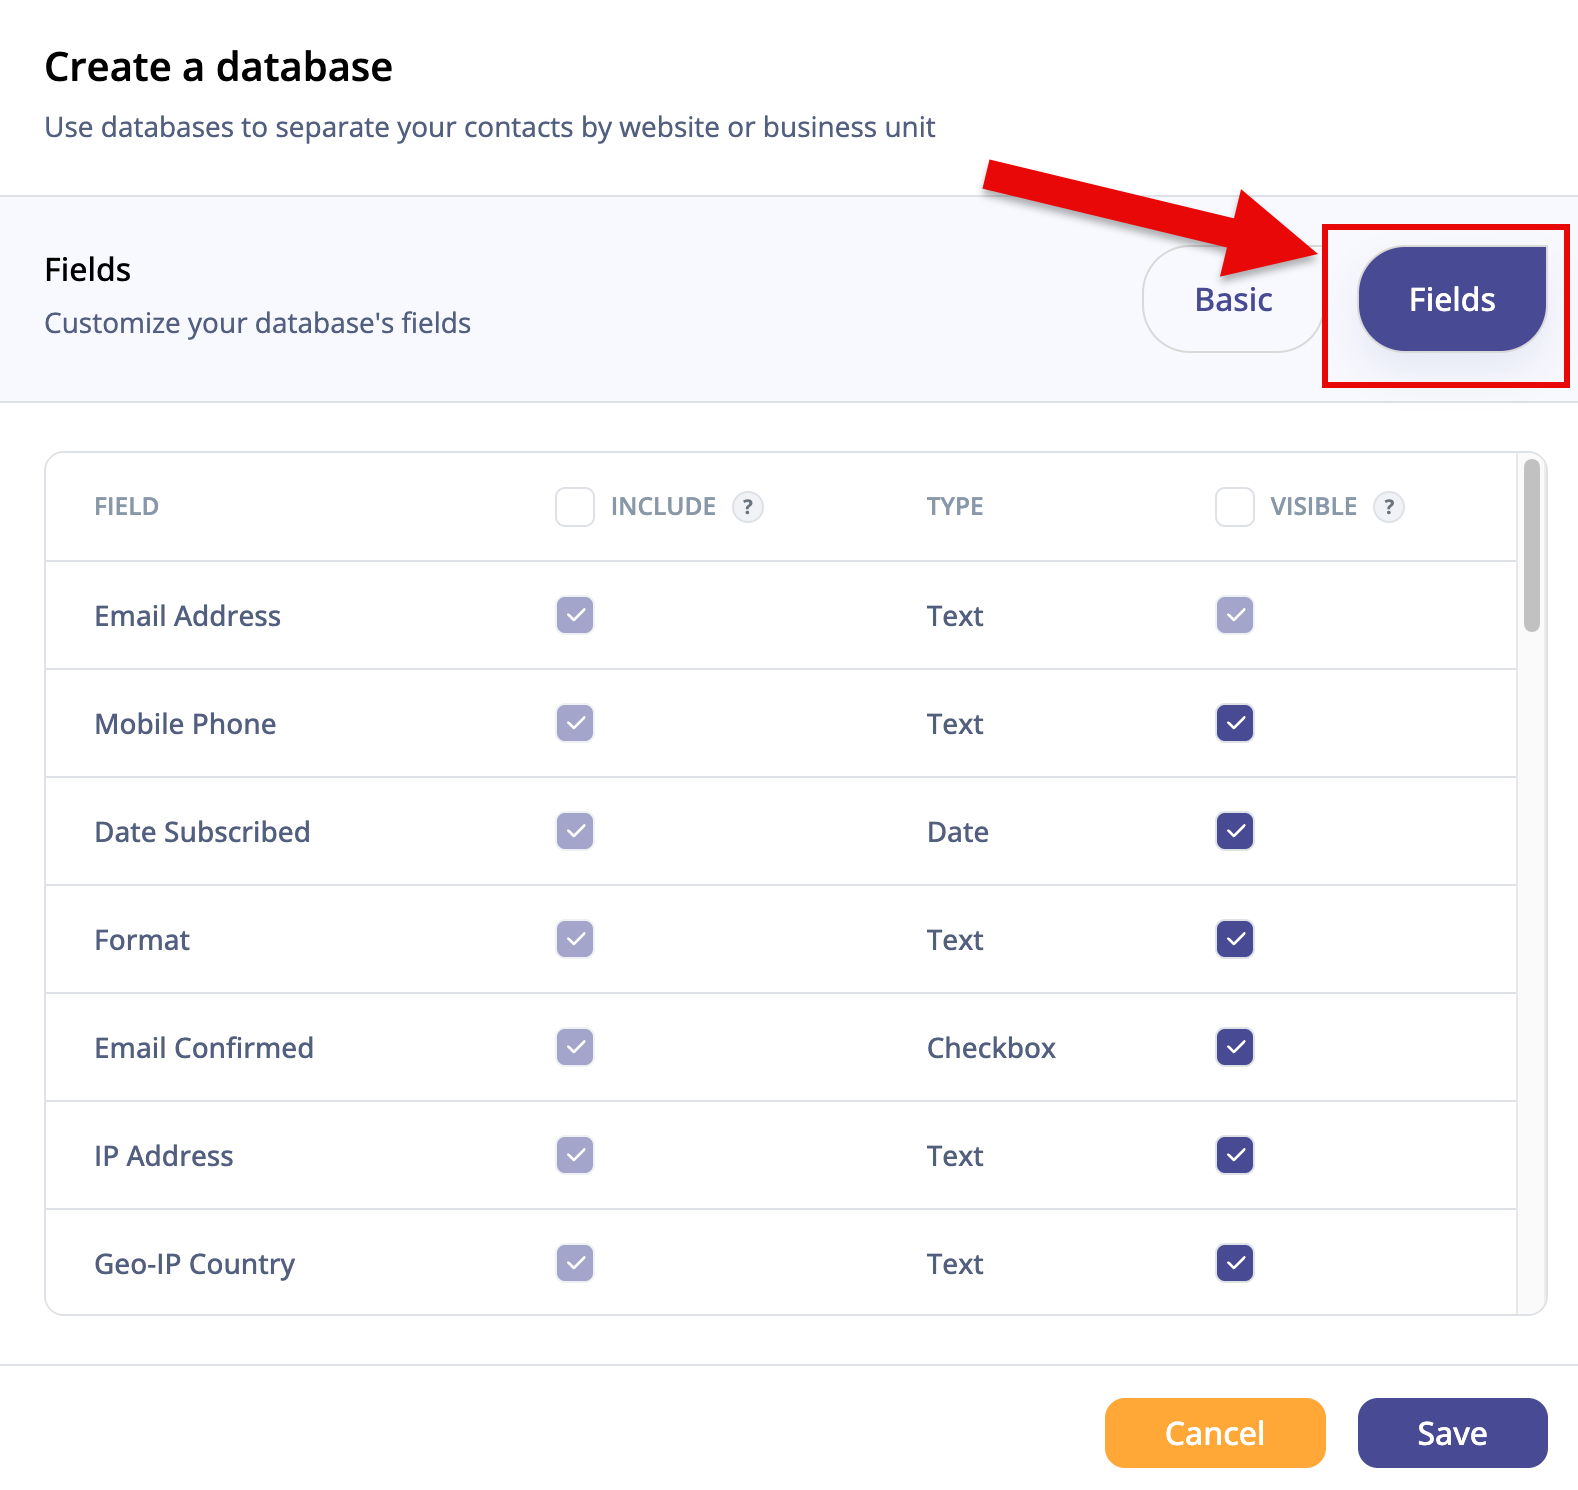
If you want to Customize the fields in your database, click the Fields button (Fig 9). Again, when you're finished, click the Save button to save your changes.
Fig 9
Apply Actions
After selecting one or more databases via the checkbox on the left, clicking the Apply Actions drop-down menu gives you access to the following actions (some may not apply depending on if you have one or multiple databases selected):
- Set database(s) label
- Delete selected database(s)
- Delete contacts from selected database(s)
- Update contacts to receive text based emails
- Update contacts to receive HTML based emails
- Update contacts email status to confirmed
- Update contacts email status to unconfirmed
- Update contact SMS status to confirmed
- Update contacts SMS status to unconfirmed
- Merge selected databases together
- Recover selected database(s)
- Purge selected database(s)
- Export selected database(s)
Transient Suppressions List
Clicking the "Transient Suppressions List" button takes you to the Transient Suppression Lists screen.
Actions
Clicking the "..." icon in the Actions column pulls up a different set of actions you can do to your database:
- Add contact
- View contact
- Edit
- Export
- Duplicate
- Import
- Suppressions list
- Statistics
- Apply labels
- Delete